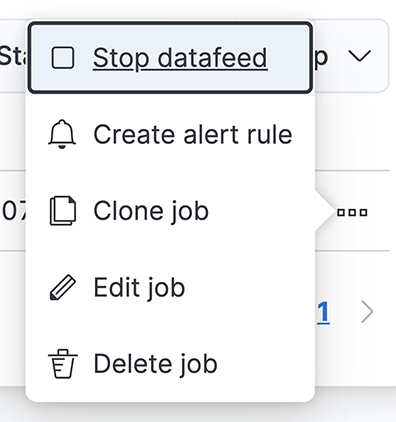
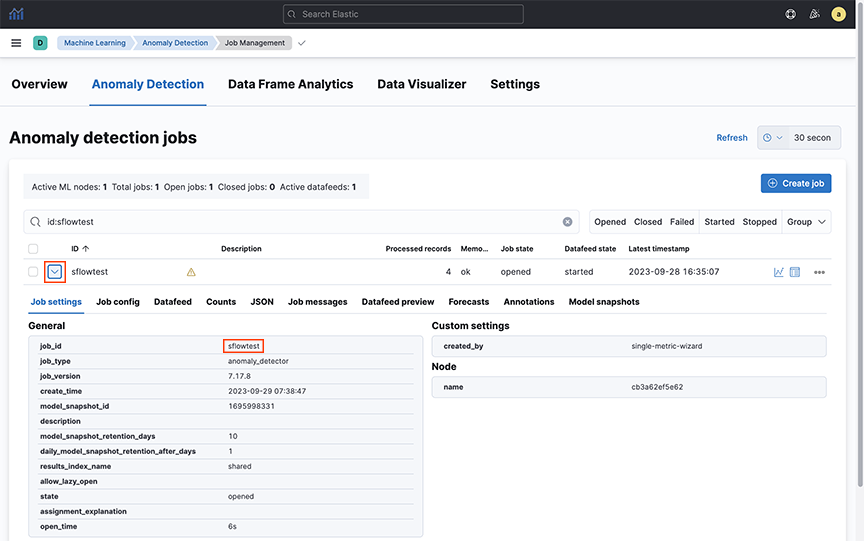
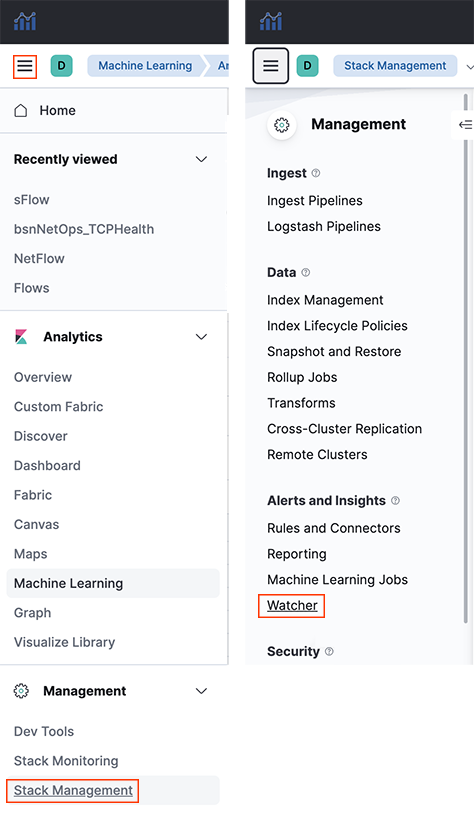
Creating Watcher Alerts for Machine Learning jobs
The following appendix describes the procedure for creating Watcher alerts for machine learning jobs, emails, and remote Syslog servers.
Watcher Alert Workaround
- Create a Watcher manually using the provided template.
- Configure the Watcher to select the job ID for the ML job that needs to send alerts.
- Use ‘webhook’ as the alerting mechanism within the Watcher to send alerts to 3rd party tools like ‘Slack.’
Email Alerts and Remote Syslog Server
Sending Watcher alerts to email required editing configuration files in the command line and restarting the Elasticsearch container previously.
An update to the Watcher alerts feature creates a simpler configuration method using the Analytics Node UI and supports sending Watcher alerts to remote Syslog servers
Configuring a Kibana Email Connector
Select an existing Kibana email connector to send email alerts or create a connector by navigating to . Complete the following steps:
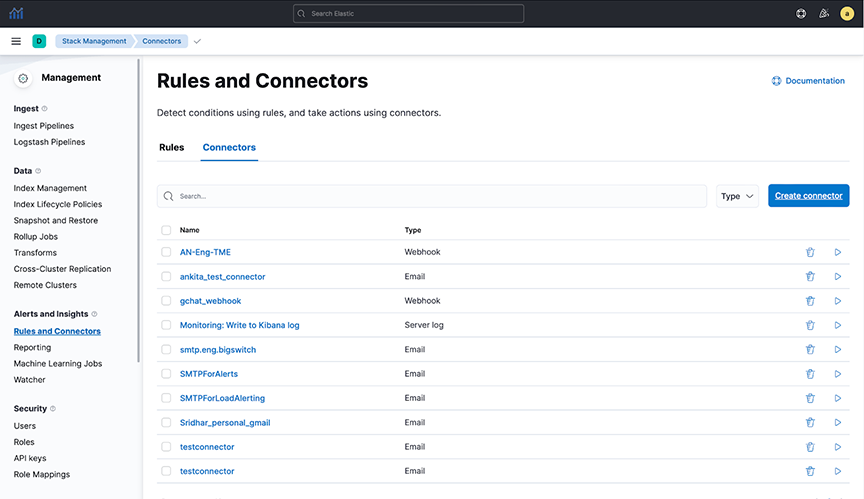
- Configure the fields in the Configuration tab.
- Verify the connector works in the Test tab.
Figure 8. Editing Connector 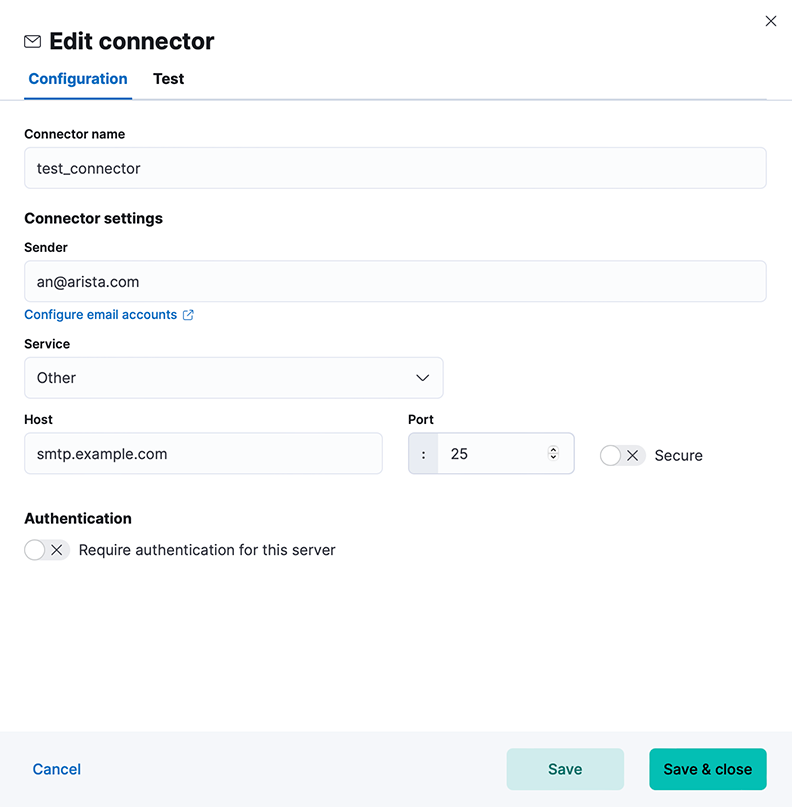
Figure 9. Editing Connector to create action 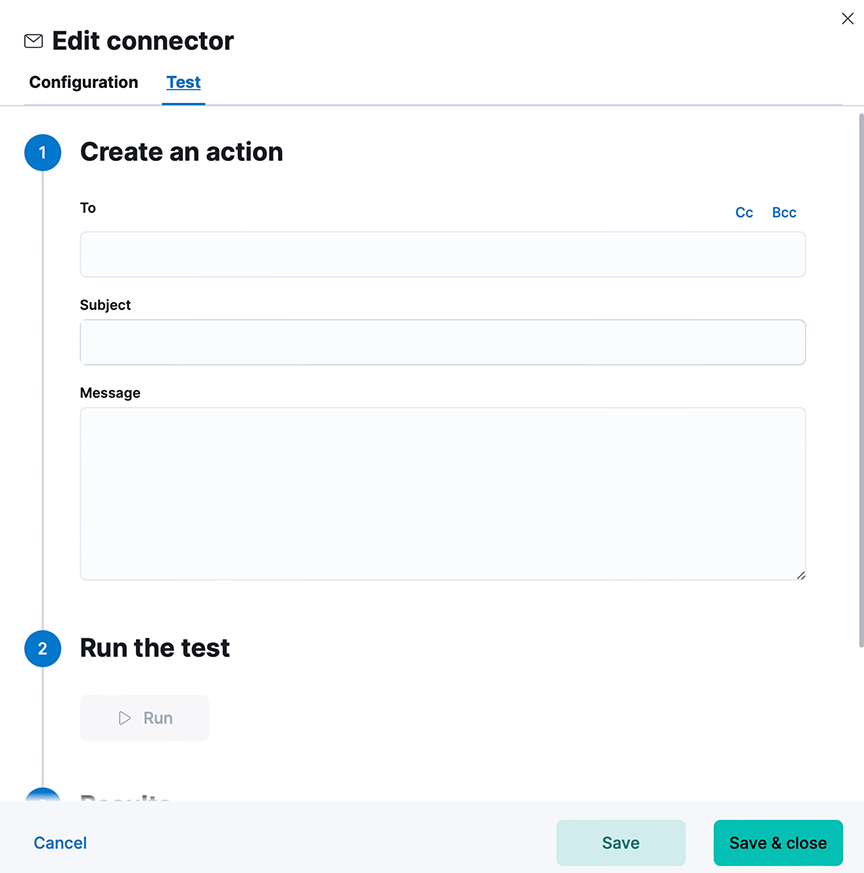
Configuring a Watch
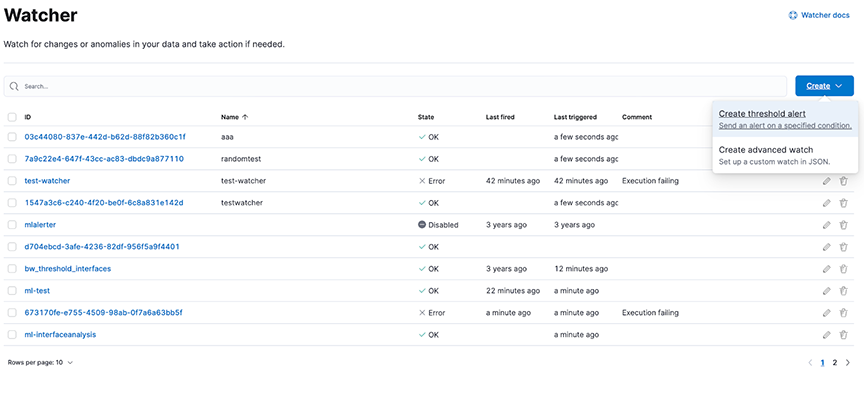
Create Threshold Alert
- Navigate to and configure the alert conditions.
Figure 11. Creating threshold alert 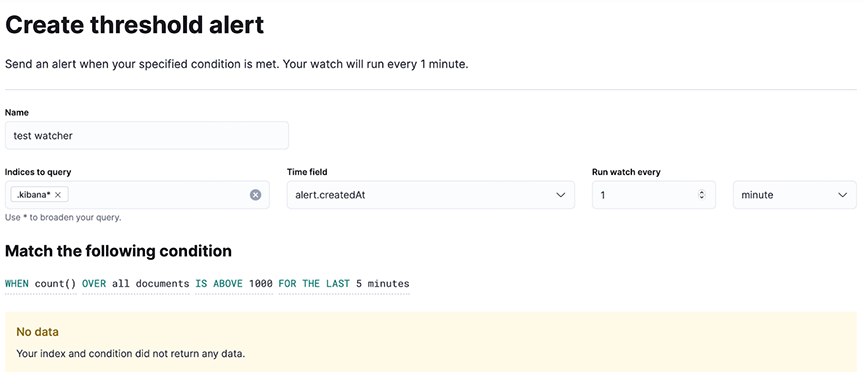
- Add a webhook action with the following fields.
- Method: POST
- Scheme: HTTP
- Host: 169.254.16.1
- Port: 8000
- Specify the Body field as follows:
- Sending Watcher alerts by email: Enter the required fields: to, subject, message, and kibana_email_connector. Multiple entries in the to field require a comma-separated list of email addresses wrapped in quotes. The kibana_email_connector field references an existing Kibana email connector.
- Sending Watcher alerts to a remote Syslog server: Enter the required fields: message, protocol, primary_syslog_ip, and primary_syslog_port. If a second Syslog server should receive alerts, include backup_syslog_ip and backup_syslog_port.
Figure 12. Performing Action for Webhook 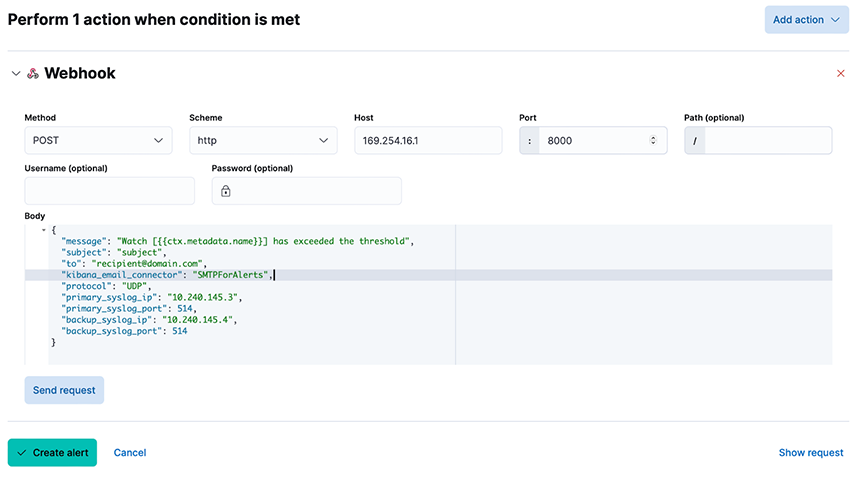
- The Path, Username, and Password fields do not need to be specified.
- Test the webhook action using Send Request before selecting Create alert. Depending on the configuration:
- Verify the receipt of an email at the configured recipient address.
- Verify the receipt of a syslog message on the remote Syslog server.
Create Advanced Watch
- Navigate to and fill out the Name and ID of the Watch.
Figure 13. Editing Advanced Watch 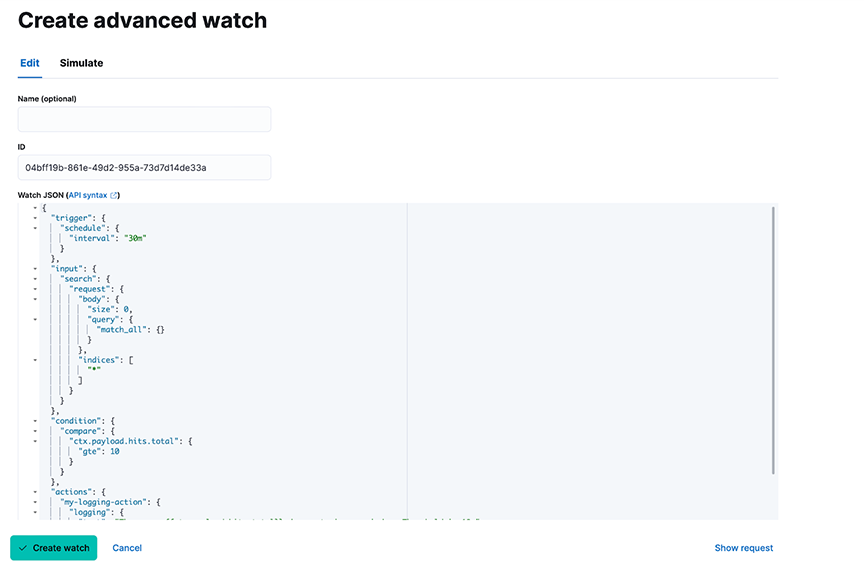
- For the Watch JSON field, the following JSON template configures the forwarding of alerts to email and remote Syslog servers. Configure the alert condition under the input and condition fields. Replace these values with any custom alert condition using the Elastic Painless scripting language. The configuration for forwarding alerts to email and remote Syslog servers is under the actions field.
{ "trigger": { "schedule": { "interval": "1m" } }, "input": { "http": { "request": { "scheme": "https", "host": "<host>", "port": 443, "method": "get", "path": "/_cluster/health", "params": {}, "headers": { "Content-Type": "application/json" }, "auth": { "basic": { "username": "<user>", "password": "<password>" } } } } }, "condition": { "script": { "source": "ctx.payload.status == 'green'", "lang": "painless" } }, "actions": { "webhook_1": { "webhook": { "host": "169.254.16.1", "port": 8000, "method": "post", "scheme": "http", "body": "{\"message\": \"The Elasticsearch cluster status is {{ctx.payload.status}}\", \"kibana_email_connector\": \"<existing-email-connector>\", \"to\": \"该邮件地址已受到反垃圾邮件插件保护。要显示它需要在浏览器中启用 JavaScript。\", \"subject\": \"Elasticsearch cluster status alert\", \"protocol\": \"UDP\", \"primary_syslog_ip\": \"<remote-syslog-ip>\", \"primary_syslog_port\": <remote-syslog-port>, \"backup_syslog_ip\": \"<remote-syslog-ip>\", \"backup_syslog_port\": <remote-syslog-port>}" } } } } - (Optional) To simulate the Watch, you can configure the fields in the Simulate Tab. The webhook action mode must be set to force_execute.
Figure 14. Simulating Advanced Watch 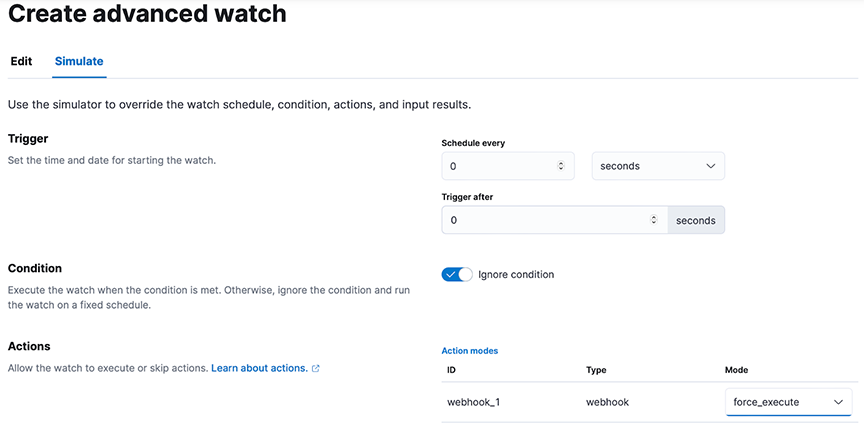
Troubleshooting
- If the email alert fails, verify that the value of the kibana_email_connector field matches the name of a Kibana email connector and that this email connector works in the Test tab.
Limitations
- Remote Syslog messages require UDP. TCP is not supported currently.
Enabling Secure Email Alerts through SMTP Setting
Refresh the page to view the updated SMTP Settings fields.
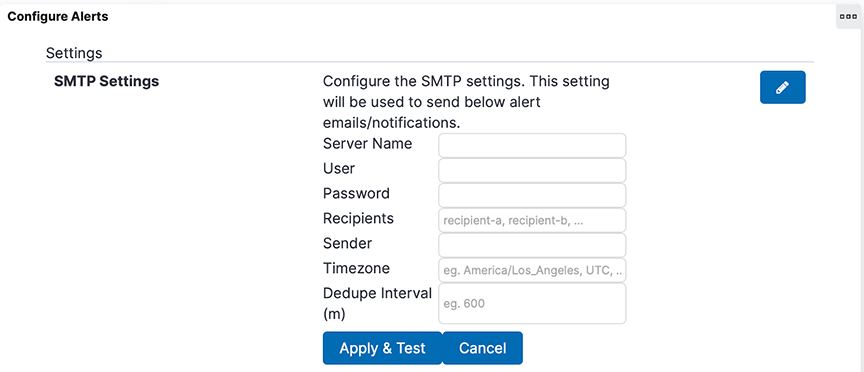
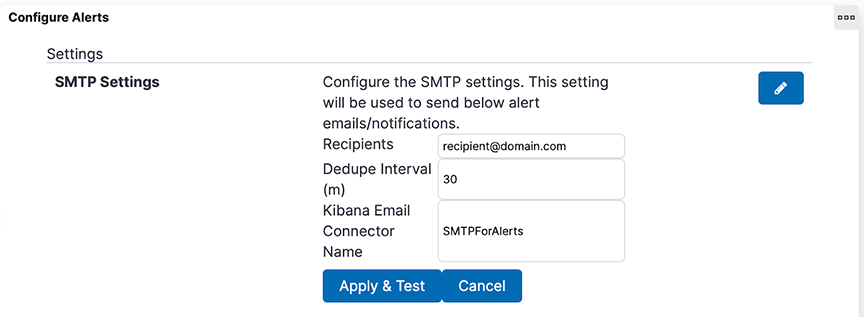
- Server Name, User, Password, Sender, and Timezone no longer appear in the SMTP Settings.
- A new field, Kibana Email Connector Name, has been added to SMTP Settings.
- The system retains Recipients and Dedupe Interval and their respective values in SMTP Settings.
- If previously configured SMTP settings exist:
- The system automatically creates a Kibana email connector named SMTPForAlerts using the values previously specified in the fields Server Name, User (optional), Password (optional), and Sender.
- The Kibana Email Connector Name field automatically becomes SMTPForAlerts.
Troubleshooting
When Apply & Test, do not send an email to the designated recipients, verify the recipient email addresses are comma-separated and spelled correctly. If it still doesn’t work, verify the designated Kibana email connector matches the name of an existing Kibana email connector. Test that connector by navigating to , selecting the connector's name, and sending a test email in the Test tab.

