CloudVision Physical Appliance Setup
You may need the following items to perform the procedures in this section:
- Key to the system key-lock.
- #1 and #2 Phillips screwdriver.
- Wrist grounding strap connected to ground.
- Rack mount kit instructions located in the shipping box.
Front Bezel
Removing the front bezel:
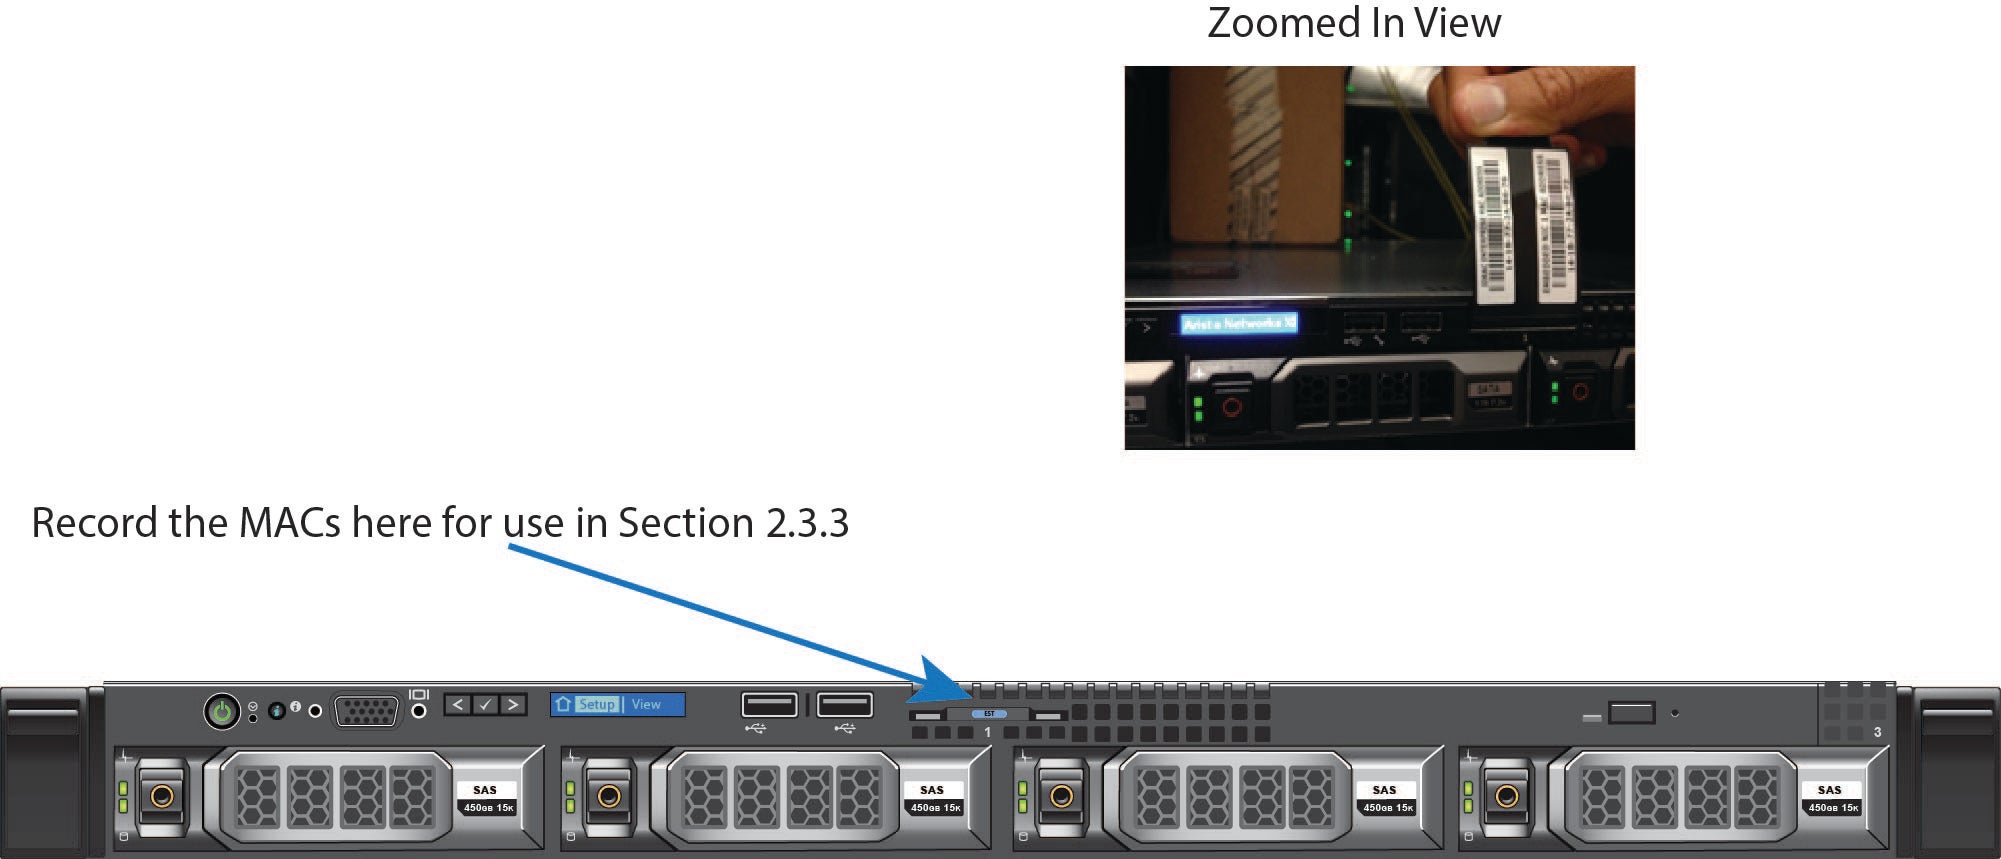
Locate the MAC Addresses for the CloudVision Appliance
The information tag is a slide-out label which contains system information such as Service Tag, NIC, MAC address for your reference. Record the MAC addresses in the CloudVision Worksheet.

Back Panel Ethernet Connections
On the back panel of the DCA-CV-100 CloudVision appliance, locate the Ethernet Integrated 10/100/1000 Mbps NIC connectors.


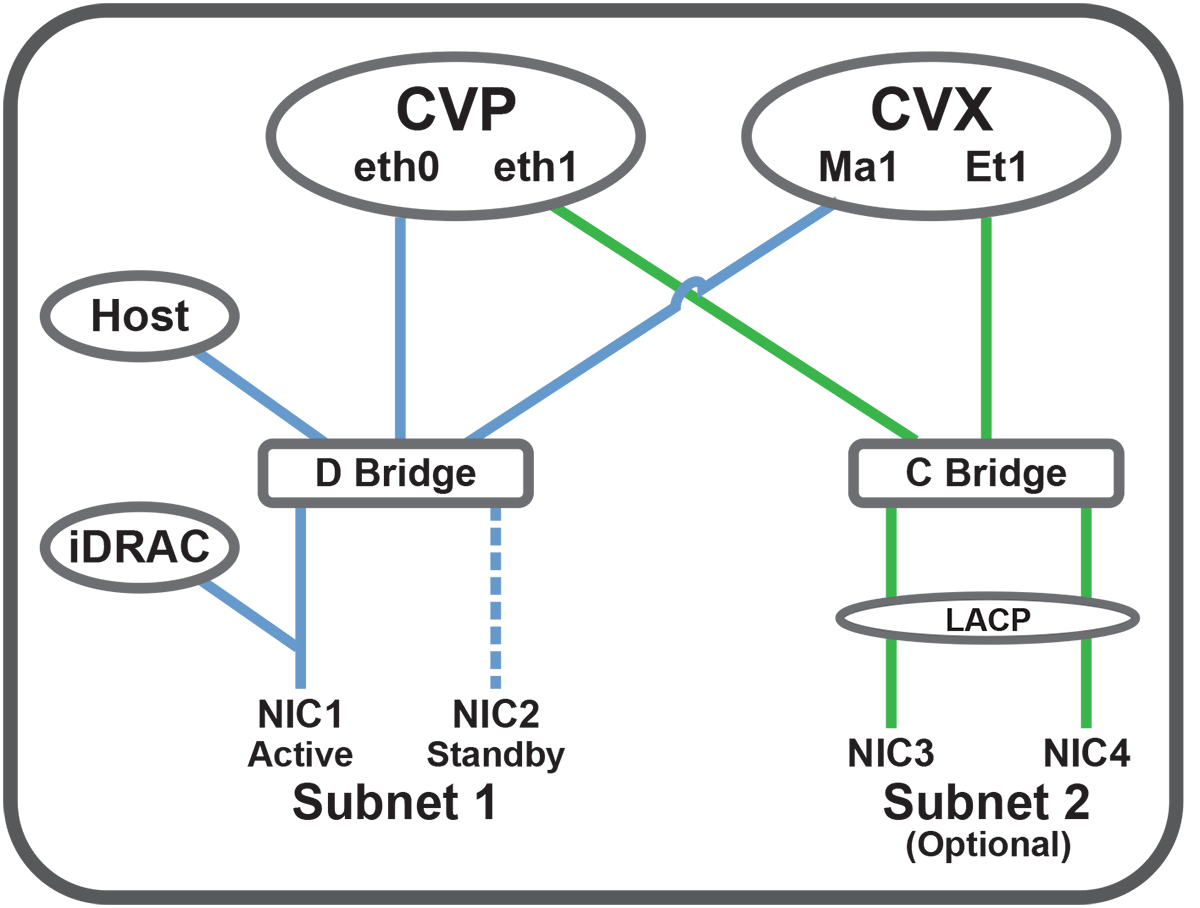
Note: The iDRAC interface shares the NIC1 physical interface but has a different MAC address.
iDRAC is an Intelligent Platform Management Interface (IPMI) that provides a GUI-based out-of-band interface for monitoring the hardware appliance. iDRAC uses NIC1 (see Figure 2-4) for its network connectivity using a unique MAC address.
Record the IP address and Hostname information in CloudVision Worksheet (see Appendix H).
Note: Subnet 1 is mandatory, but Subnet 2 and the use of Ethernet NIC3 and NIC4 are optional.
Note: iDRAC may also be refereed to as Lifecycle Controller.
DNS Entries
In order to manage your CloudVision cluster, it is often easier to connect to them by hostname as opposed to IP address. Fully qualified domain names (FQDNs) should be allocated to:
- Each of the CloudVision Appliance host machines.
- Each of the CloudVision Appliance iDRAC interfaces.
- Each of the CloudVision Portal (CVP) nodes.
- Each of the CloudVision Server (CVX) nodes.
Contact your DNS zone administrator for assistance.

