Appliances
- Managing Appliances in the ETM Dashboard
- Adding Edge Threat Management Appliances to the ETM Dashboard
- Upgrading Appliances via the ETM Dashboard
- Assigning a Location to Appliances in the ETM Dashboard
- Managing Backup Configurations in ETM Dashboard
- Labeling Appliances in the ETM Dashboard
- How to Remove an Appliance from the ETM Dashboard
Managing Appliances in the ETM Dashboard
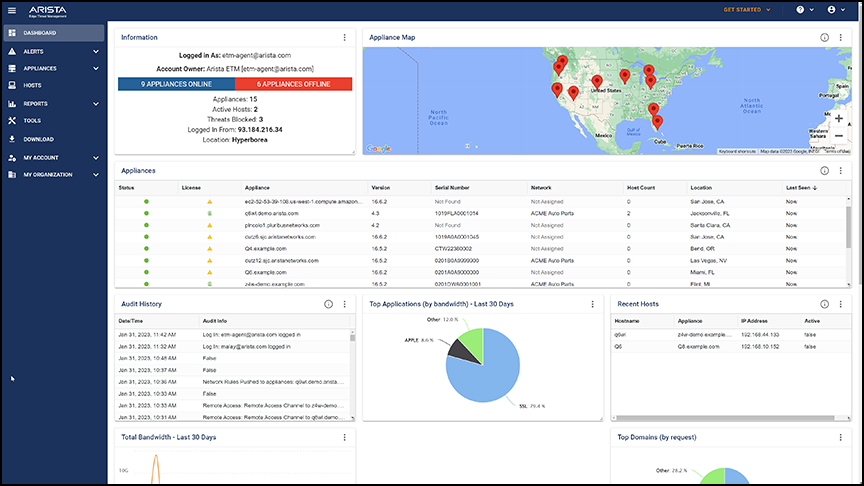
The ETM Dashboard is a cloud-based service for managing Edge Threat Management appliances. For example, you can perform the following appliance management tasks using the ETM Dashboard:
- See the status of all your deployments in a single dashboard view.
- Remotely connect to your appliances without logging in.
- Push shared configuration profiles to multiple appliances.
- Backup and restore configuration.
- Apply or transfer a license subscription.
- Set up notifications to your email, Arista Go mobile app, Slack, PagerDuty, or VictorOps accounts
- Review consolidated alerts and reports.
Requirements:
- NG Firewall version 12.2 or higher. No minimum version of Micro Edge is required to connect to the ETM Dashboard.
- Registered account in ETM Dashboard. You can create an account here.
- Connect to ETM Dashboard option in NG Firewall must be enabled. You can find this option in .
The ETM Dashboard is a free service. However, for full functionality, you must assign your appliance a subscription. Features that require an appliance subscription include Policies, Alerts, Reports, and Networks.
Adding an Appliance to your ETM Dashboard Account
You can add NG Firewall and Micro Edge appliances to ETM Dashboard: Adding Edge Threat Management appliances to ETM Dashboard.
Adding Edge Threat Management Appliances to the ETM Dashboard
You can remotely manage and access your NG Firewall and Micro Edge appliances by adding them to your ETM Dashboard account. If the appliance is online but not configured, you can add it based on its serial number by a process referred to as Zero Touch Provisioning. Alternatively, you can add the appliance using its UID if you do not know the serial number.
Upgrading Appliances via the ETM Dashboard
The ETM Dashboard enables the admin to upgrade multiple appliances simultaneously without connecting to each one. You can also configure schedules for automatic upgrades in the ETM Dashboard.
Upgrading Multiple Appliances
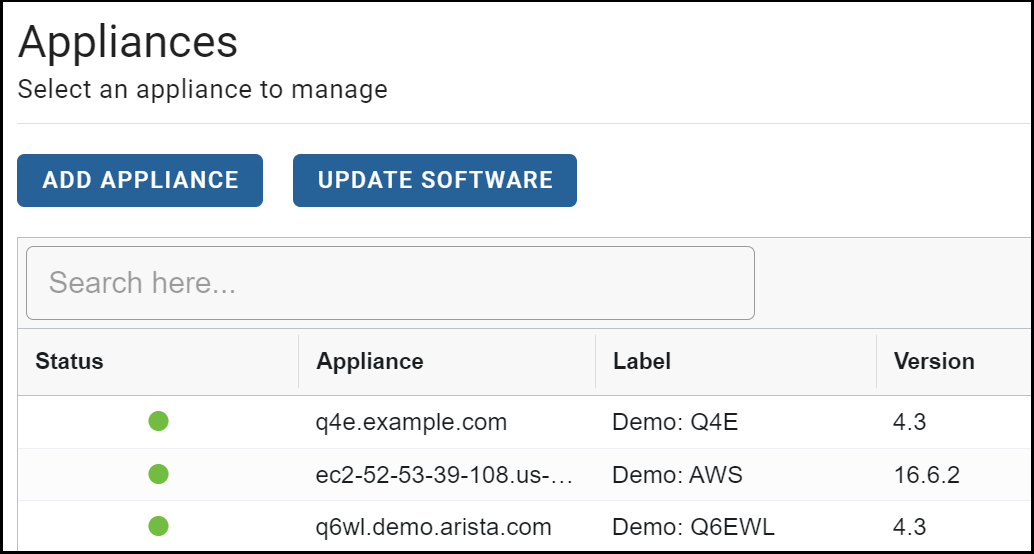
- Go to the Appliances page. The Appliances grid displays the software version of each device.
- Click the blue Update Software button at the top of the list.
- The list of appliances is filtered only to include those that can be upgraded.
- Select the appliances you want to upgrade and click the Update button.
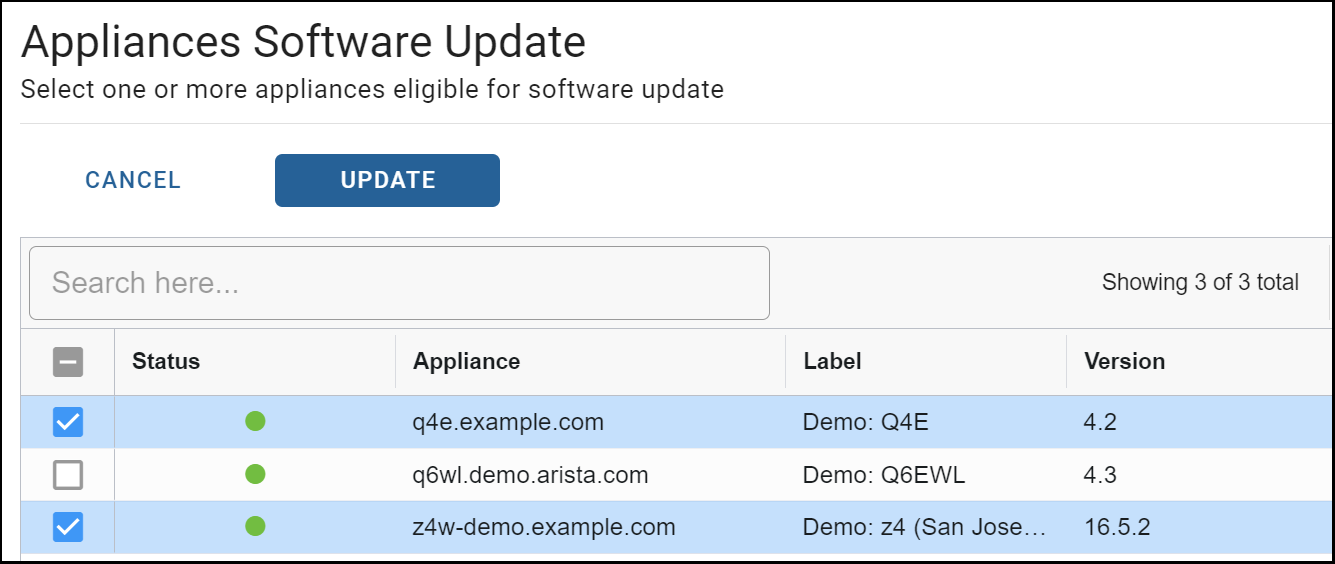
The update process is initiated for all selected appliances.
Configuring Scheduled Automatic Upgrades
- Go to Appliances and select the appliance to set the scheduling policy.
- Click the Update Software button.

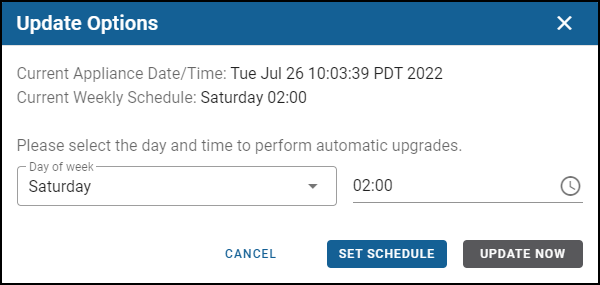
Select the day and time you want the appliance updated in the menu that pops up.
- Click Set Schedule to apply the schedule.
Assigning a Location to Appliances in the ETM Dashboard
The ETM Dashboard and Appliance detail screens display a map showing the geographic location of your appliances. These detail screens help you identify which appliance you want to manage or see from a single view where all your appliances are geographically located. The ETM Dashboard uses IP-based geo-location technology to estimate the location of your appliances. You can assign a precise address in the appliance details if you prefer to define a precise address.
Updating an Appliance Location
Select an appliance to view the current assigned location data in the Appliances view. The appliance location appears in the Appliance Map widget.
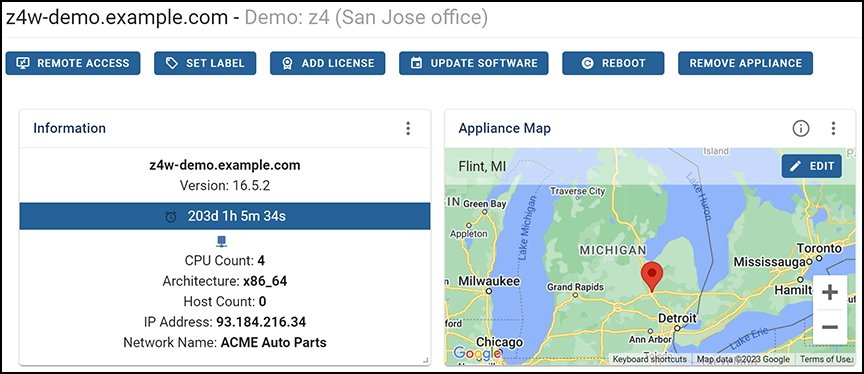
- Click Edit.
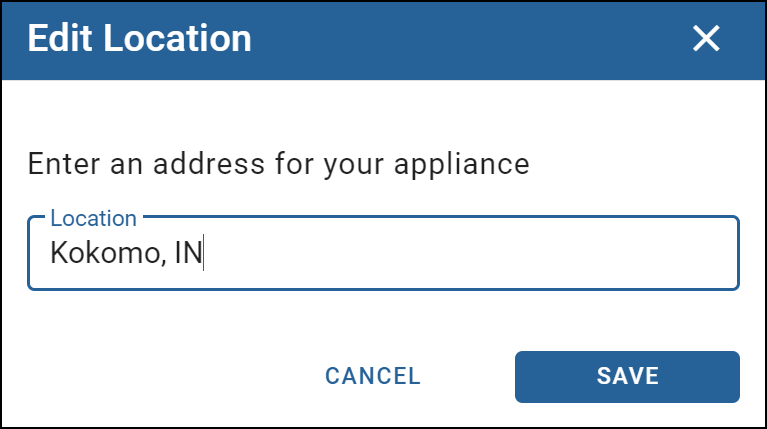
- Enter the new address.
- Click Save.
Managing Backup Configurations in ETM Dashboard
The ETM Dashboard enables you to automatically backup configuration data from appliances connected to your account. After an appliance performs at least one backup to the ETM Dashboard, you can select the backup file as a Configuration Template or restore it to the source appliance or any other appliance connected to this account.
Requirements
This functionality requires the Configuration Backup for the NG Firewall.
This feature operates automatically in Micro Edge: no special settings or configurations are required.
Notes Regarding Restoring Backups
A backup file can only be restored to the same version it was drawn from or one newer version. For example, an NG Firewall backup taken on 16.5 can be restored to 16.5 or 16.6. A backup taken on Micro Edge 4.2 can be restored to 4.2 or 4.3.
Backup files are not "backwards compatible," meaning that a backup file cannot be used on an older version of the software than the one it was taken on. For example, NG Firewall 16.5 cannot be restored to an NG Firewall running version 16.4 or older.
NG Firewall backups can only be restored to the NG Firewall. Micro Edge backups can only be restored to Micro Edge.
Restoring a Configuration Backup to the Source Appliance
- Go to the Appliances heading along the left-hand side of the page and select the Appliances tab.
- Select the appliance from the appliances list.
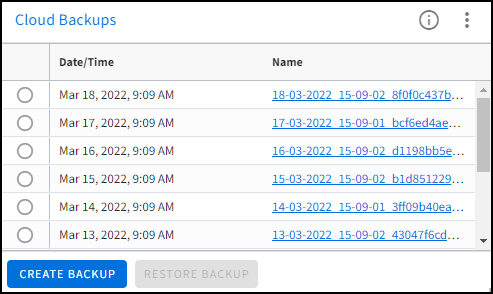
- Find the Cloud Backups Widget.
- Select a backup file by date and click Restore Backup.
- Click Yes to confirm.
Restoring a Backup to a Different Appliance
This option is useful when upgrading or replacing hardware or after a reinstall of the appliance.
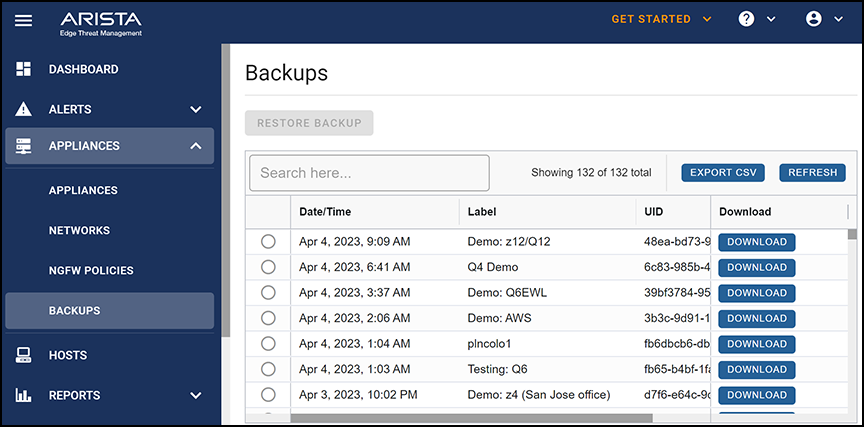
- Go to the Appliances heading along the left-hand side of the page and select the Backups tab.
- Select the backup configuration you would like to restore. The UID and Label columns identify the NG Firewall from which these settings were taken.
- Click the Restore Backup button.
- The Restore Backup menu opens, displaying all eligible NG Firewall appliances in your account. Select one or more appliances to push the config and click Restore Backup.
- A confirmation menu displays your chosen backup file and the appliances you will restore to. Verify your selections and click Confirm Restore to initiate the backup.
Creating a Backup File Manually
Click the Create Backup button in the Cloud Backups widget on the Appliances page to force an immediate backup of the selected appliance.
Downloading a Backup File
- From the Cloud Backups widget on the Appliances page, click the link in the Name column.
- From the Backups page, click the Download button on the right-hand side.
Configuration Backup
NG Firewall's Configuration Backup enables you to recover from hardware failures and disasters. Configuration backup is also used to replicate configuration across multiple deployments of NG Firewall. If installed and enabled, Configuration Backup automatically backs up your configuration on a daily basis to Dashboard and as a secondary option to Google Drive.
Prerequisites
- To use Configuration Backup you must have the Complete Package or Live Reports , which is available as an à la carte item.
- To view the status of backups you need the Configuration Backup Reports app.
- To access your backups your appliance must be connected to your ETM Dashboard account. To verify that NG Firewall is connected to ETM Dashboard, refer to the Support screen.
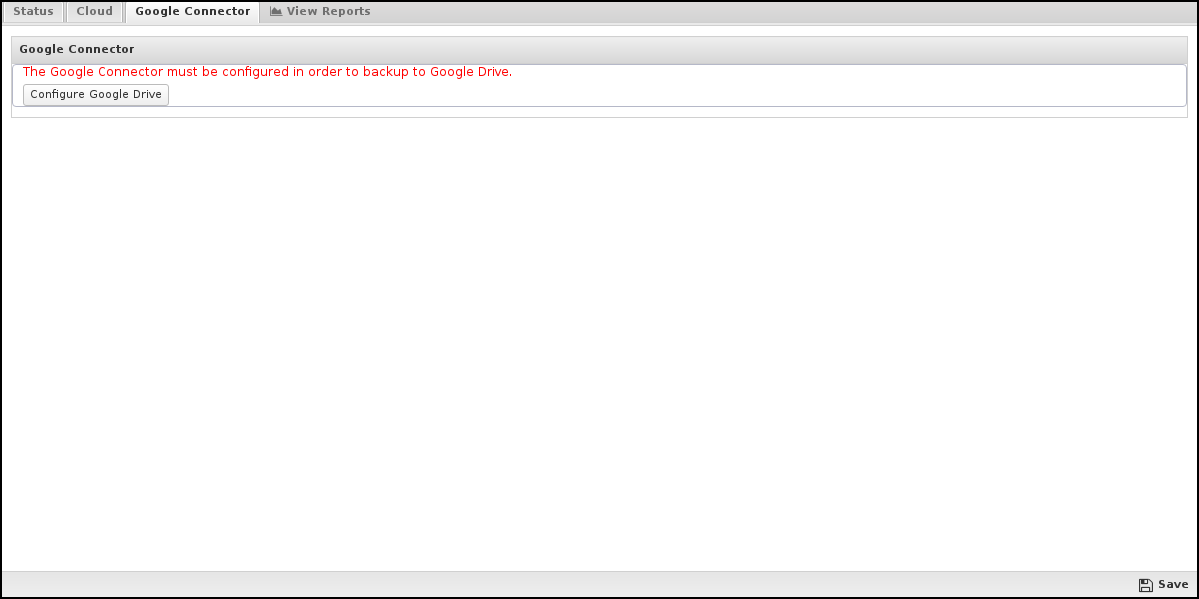
- To backup to Google Drive, a Google account must be authenticated using Directory Connector .
Installing the Configuration Backup App
- In the NG Firewall administration, click Apps in the menu at the top of the screen.
- Verify if the Configuration Backup app is installed. If not, follow the steps below to install the app.
- Click Install Apps.
- Click the Configuration Backup app.
- Click Back to Apps and wait for the app to finish the installation.
- In the Apps screen, click the Configuration Backup app to configure backups.
- Toggle the Power switch to enable or disable automatic backups.

- Click the Cloud tab.
- Review the Daily Backup setting and modify the Hour and Minute if necessary based on when you want the daily backup to occur.
- Click Backup now if you want to initiate an immediate backup.
Configuring a Secondary Backup using Google Drive
- Go to the Google Connector tab.
- Check Enable upload to Google Drive:
- Confirm the name of your Google Drive Directory.
- Click Save.
Viewing Backup Activity
To view backup activities such as the most recent backup or potential failures, click Reports in the top menu or click one of the predefined reports in the Status screen.
Reports
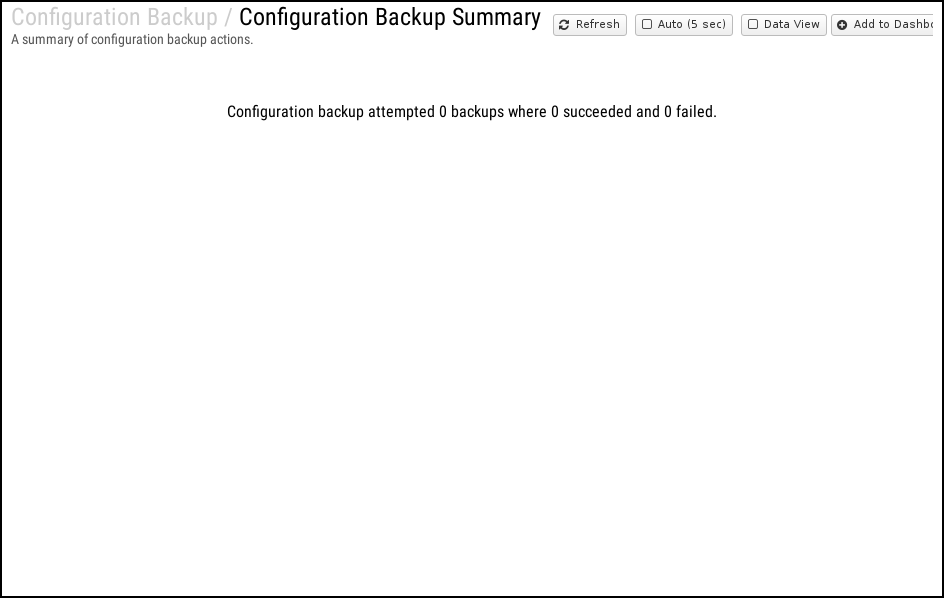
The Configuration Backup reports summarize the backup activities, including successful or failed backups.
| Report Entry | Description |
|---|---|
| Configuration Backup Summary | A summary of configuration backup actions. |
| Backup Usage (all) | The amount of successes and failures of configuration backup over time. |
| Backup Usage (success) | The amount of successful configuration backups over time. |
| Backup Usage (failed) | The amount of failed configuration backups over time. |
| Backup Events | All Configuration Backup events. |
Restoring a backup using ETM Dashboard
- Log in to Dashboard with your account.
- Click Appliances in the top menu.
- Select an appliance from the Appliances list.
- Locate the Cloud Backups panel and select a backup based on the timestamp.
- Click Download.
- Click Yes to confirm.

Restoring a Backup in Google Drive
- Log in to your Google account.
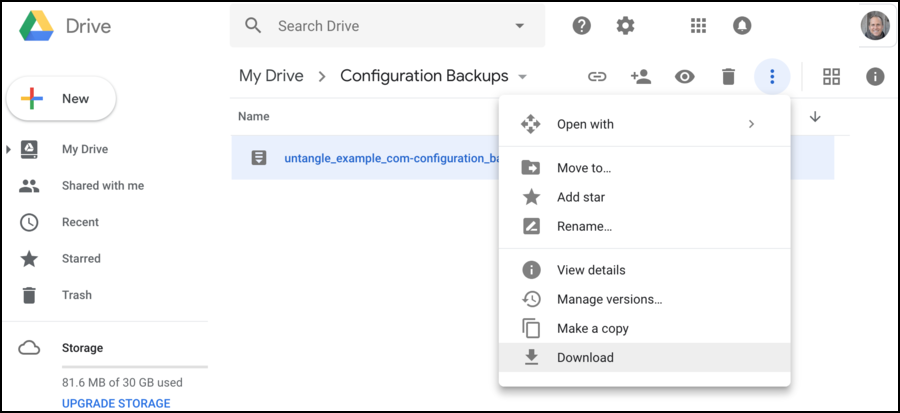
- Go to your Google Drive and locate the directory used by NG Firewall (e.g. Configuration Backups).
- Select the backup file and click Download from the menu.
- Log in to your NG Firewall.
- Go to .
- Choose a Restore Option.
- Click Restore from File and select your backup file.
Related Topics
Dashboard
The Dashboard provides an overview of the state of your NG Firewall. It is useful for quickly viewing or monitoring what is happening on the network and the current status of the NG Firewall server.
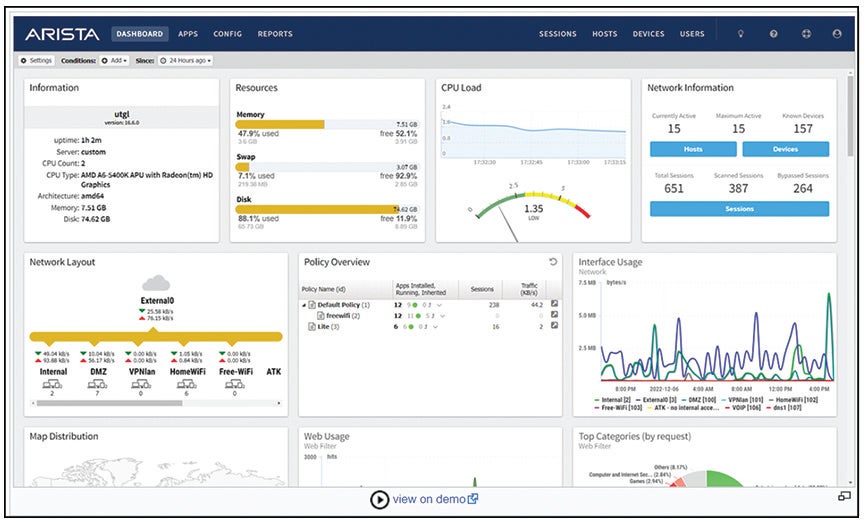
By default, the Dashboard will show several widgets with varying information. However, the Dashboard is completely customizable. Widgets can be removed and added so the administrator sees exactly the information that is important to them on the Dashboard.
There are many different types of widgets available:
| Information | Shows some information about the NG Firewall, like name, model, version, etc. |
| Resources | Shows an overview of current memory swap and disk usage. |
| CPU Load | Shows a graph of recent CPU load. |
| Network Information | Shows an overview of the network information, such as session count and device/host count. |
| Network Layout | Shows an overview of the network layout based on the interface configuration. |
| Map Distribution | Shows the current sessions' mapped geolocation on a world map, sized by throughput. |
| Report | Shows any Report Entry. |
To change what is displayed on the dashboard, click Manage Widgets at the top. From here, you can show or hide the built-in widgets or add new widgets from Reports by clicking on the Add button.
When adding a Report widget, specify a time frame (the number of hours worth of data to display) and a refresh interval (how often the widget refreshes on the dashboard).
When viewing a Report Entry in Reports, you can easily add it to your Dashboard by clicking the Add to Dashboard button.
If you see an alert icon near the top of the dashboard, hover over it for more information. These are Administrative Alerts designed to help you keep your NG Firewall healthy.
Configuration Backup Reports
The Reports tab provides a view of all reports and events for Configuration Backup.
Reports
This applications reports can be accessed via the Reports tab at the top or the Reports tab within the settings. All pre-defined reports will be listed along with any custom reports that have been created.
| Report Entry | Description |
|---|---|
| Configuration Backup Summary | A summary of configuration backup actions. |
| Backup Usage (all) | The amount of successes and failures of configuration backup over time. |
| Backup Usage (success) | The amount of successful configuration backups over time. |
| Backup Usage (failed) | The amount of failed configuration backups over time. |
| Backup Events | All Configuration Backup events. |
Restore
Restore allows restoring settings from backups created in or the Configuration Backup application.
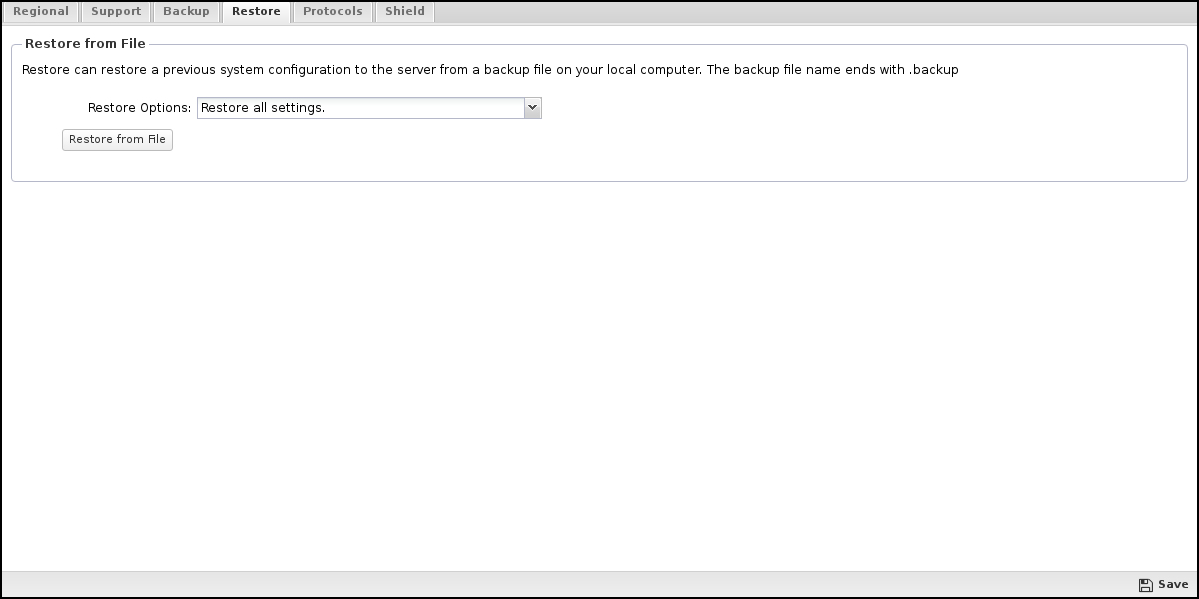
Restore from File
This allows you to upload the restored file.
- Restore all Settings will restore all the settings in the backup file.
- Restore all except keeping current network settings will restore all the settings in the backup file except the network settings. The current network settings will be maintained.
The first option is typically used to restore to a previous backup or recover from a failure.
The second option is useful if you maintain a 'standard configuration' and you want to maintain this standard configuration across multiple servers. In this case, all the servers maintain the same settings, but each has unique network settings.
After selecting the Restore Options, click Browse and select the backup file you want to restore. After selecting the backup file, click Restore from File to begin the restore process.
Restore Process
After starting the restore process, the backup file is unpacked and checked.
If the backup file requires certain applications that are not currently on the NG Firewall server, it will ask to download these applications first. After downloading those applications, the restore process is run again.
If the backup file is from an unsupported version, it will show an error. It is also suggested that a backup file from the same version that the file was created with be restored. For example, if the backup file was created with NG Firewall 16.2, restoring it on an NG Firewall running 16.2 is suggested.
Typically, the restored process's only supported versions will be the current version of NG Firewall and the immediately prior major version. For example, 16.2 will restore 16.2 and 16.1 backups, not 16.0. (Trivial versions are considered identical to the minor version for restore purposes. For example, 15.1.0, 15.1.1, and 15.1.2 are all considered 15.1 when restoring backups.)
After the restore process begins, the NG Firewall processes will reboot, and you will lose connection to the server. After reconnecting to the server, the settings and configuration are restored from the backup file.
Labeling Appliances in the ETM Dashboard
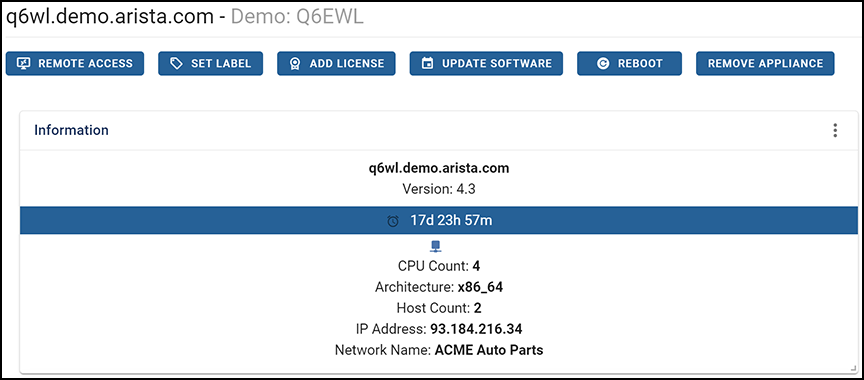
You can assign a label to appliances in the ETM Dashboard to help you identify them in a list. By default, the appliance displays its hostname first, then its label. In the following screenshot, the label is Demo: z4, in grey.
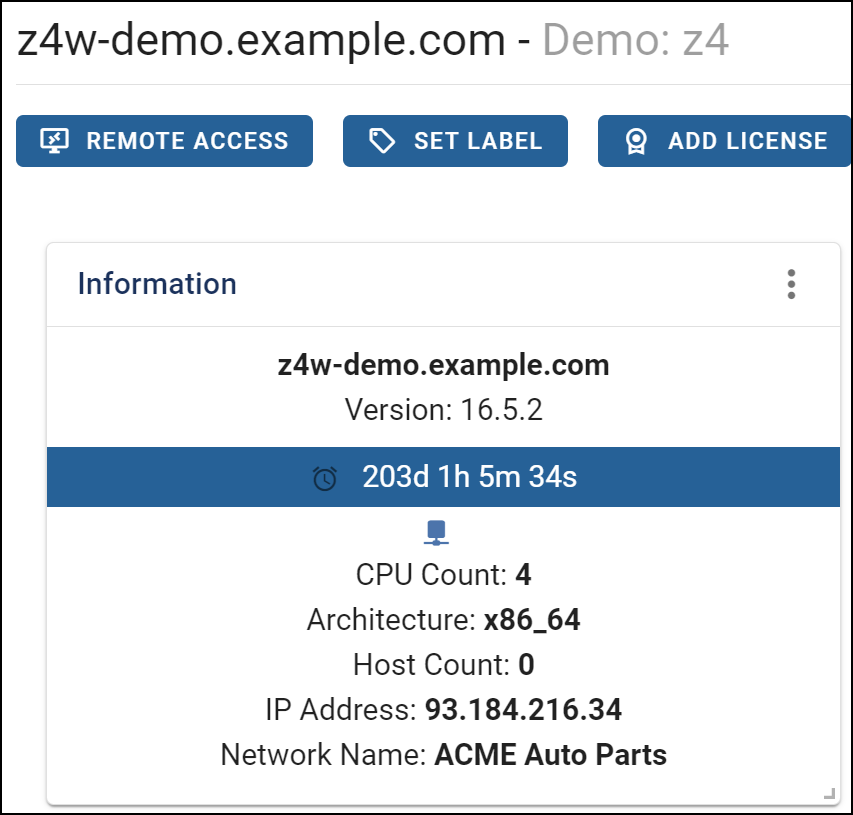
To Assign a Label:
- Click the Appliances option in the top bar.
- Select the appliance from the list.
- Click the Set Label button.
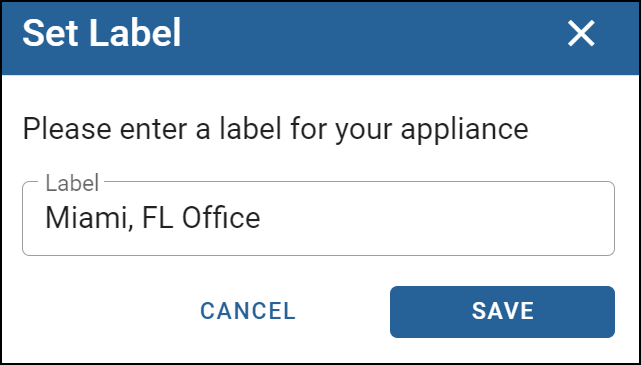
- Enter your label and click Save.
How to Remove an Appliance from the ETM Dashboard
In some situations, you may need to remove an appliance from your ETM Dashboard account. For example, you want to move your appliance to another account, or you reinstalled the NG Firewall, and the appliance has a new UID.
It is also removed if the appliance is part of an SD Network. However, tunnel configurations created on the appliance will remain and should be removed manually.
Removing an Appliance
To remove an appliance from your account:
- Navigate to Appliances.
- Select the appliance to be removed.
- Click the Remove Appliance button.
- Confirm that you want to remove the appliance from your account.
