Installing the Access Point
This chapter contains the stepwise procedure to install the access point (AP).
Zero-Configuration of the Access Point
The AP supports zero-configuration under the following conditions:
- The device must be in AP mode with background scanning on and without an SSID configured.
- Set up a DNS entry for wifi-security-serveron all the DNS servers. This entry should point to the IP address of the server. By default, the AP looks for the DNS entry wifi-security-server.
- Place the AP on a subnet with DHCP-enabled.
Refer to these articles to understand how APs communicate with the server, and the ports that you need to open to enable the communication:
Important: If placing the device on a network segment separated from the server by a firewall, you must first open port 3851 for User Datagram Protocol (UDP) and Transport Control Protocol (TCP) bidirectional traffic on the firewall. This port number is assigned to Arista Networks. Zero-configuration does not support setting up multiple devices to connect to multiple servers. In this case, you must manually configure the APs. See the Access Point Configuration Guide on the Arista website at Arista Product Documentation.
Assign a static IP to the AP or change the settings to DHCP. Make a note of the MAC address and the IP address of the AP in a safe place before installing it in a hard-to-reach location. Locate the MAC address of the AP on a label at the bottom of the product.
Use the following steps to install the device:
The steps to install the AP with no configuration (zero-configuration) are as follows:
Pole Mount the AP
Use the mounting bracket and metal clamps to install the AP on a pole. Standard accessories include the mounting bracket and two metal clamps.
To mount the AP:
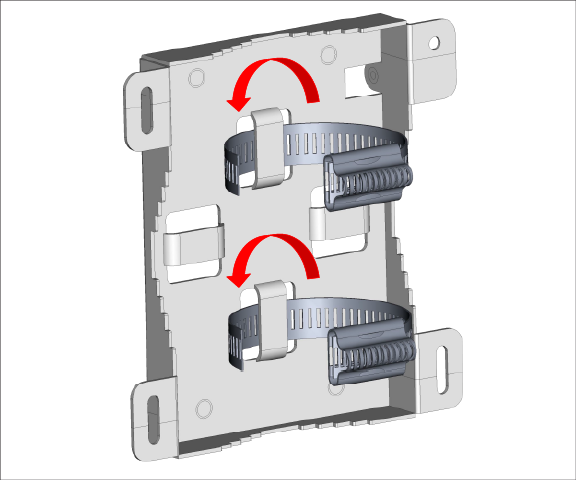
- Insert the two metal clamps into the bracket. You can insert the clamps either in the horizontal or vertical slots depending on the position the pole-mount bracket for use on a vertical or horizontal pole.
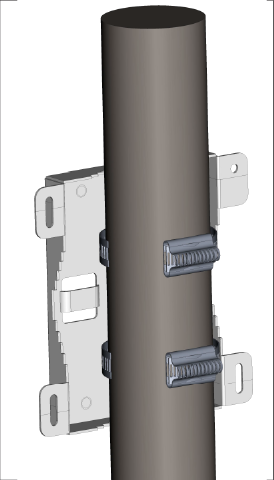
- Fix the bracket to a pole. You can position the pole-mount bracket for use on a vertical or horizontal pole.
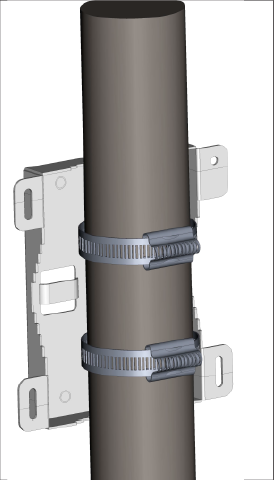
- Fasten the two metal clamps into the slotted driver.
- Mount the AP to the bracket.
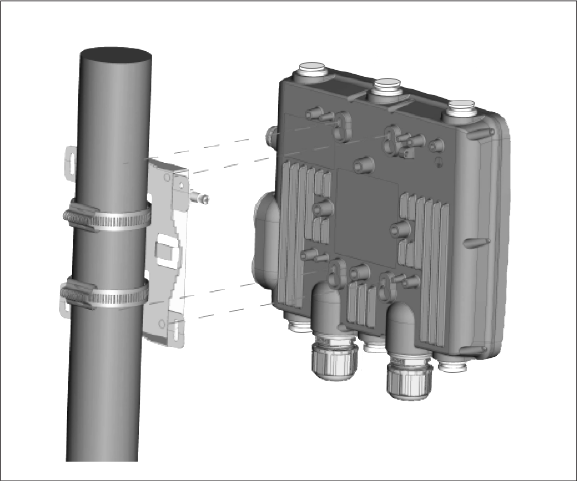
- Tighten the thumb screw using Philips# 2 screwdriver.
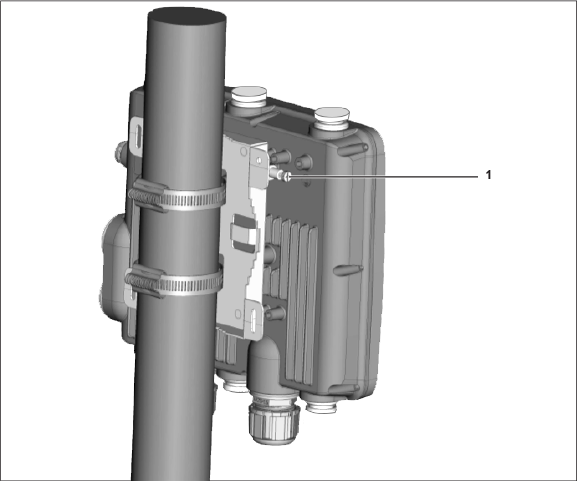
Table 1. Labels: Parts Label Description 1 Use a Philips #2 screwdriver to fasten the screw.