General Configuration
Config
The config tab holds all the settings related to the configuration of the NG Firewall server itself and settings for components of the platform that apps may interact with.
This is a list of all sections available under the Config tab in the Administration UI.
Network
The Network Configuration documentation documents how networking in NG Firewall functions and is commonly configured.
Administration
Local Directory
Local Directory stores a list of users that can be used by the applications. It also supports RADIUS for 802.1x authentication from properly configured wireless network access points.
The RADIUS Server can be enabled to allow WiFi users to authenticate as any user configured in the Local Directory.
Upgrade
Upgrade allows the server to upgrade and contains upgrade-related settings.
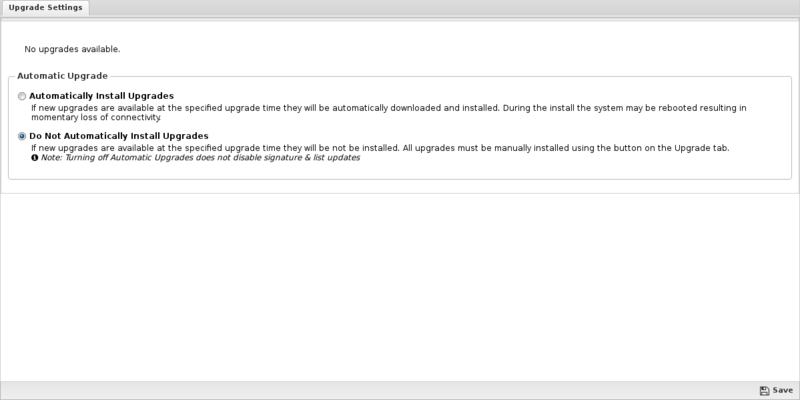
Upgrade Settings
Upgrades show the currently available upgrades, if any. If upgrades are available, an upgrade can be started by pressing the Upgrade button at the top under Status.
To see changes, see the Changelogs.
After the upgrade begins, it will download the new packages (which may take some time), and then the upgrades will be applied. Do not reboot or power off the server during the upgrade.
If Automatically Install Upgrades is checked, NG Firewall will automatically check for new versions and upgrade if available.
Automatic Upgrade Schedule configures when NG Firewall will automatically upgrade if upgrades are available. NG Firewall will automatically upgrade at the specified time on the days of the week that are checked.
Upgrade FAQs?
- Upgrades are rolled out over time to NG Firewall deployments. The rollout can stretch out several weeks. If you want the upgrade immediately, email your UID to このメールアドレスはスパムボットから保護されています。閲覧するにはJavaScriptを有効にする必要があります。 and request that they add your UID to the Early Upgrade list.
- In the Upgrade page of your NG Firewall, when a new version is available, the Upgrade button will appear. If automatic upgrade setting is enabled, your NG Firewall will upgrade automatically once the upgrade is available on the day and time specified.
- If a reboot is needed, the upgrade will reboot automatically once installed. There is no need for a manual reboot. Most upgrades will not reboot as there is no kernel change.
- It's difficult to be precise since customer platforms, Internet connection speed, and complexity of the upgrade vary. Generally, upgrades take less than 20 mins. If the database version is changed as part of the NG Firewall upgrade, the process will take longer as the database will need to be converted. There are extreme cases where the upgrade takes over an hour.
- No, the upgrade process will update all the components on the NG Firewall seamlessly.
- Release changes are posted on the NG_Firewall_Changelogs page.
System
The system contains settings related to the server
About
About contains system information
Reports
The reports tab is only visible if the Reports app is currently installed. To read more about reports, view the reports documentation.
About
Discusses Servers, Licences, and License agreements.
Server

Unique ID
The first field shows the Unique ID (UID) of the Arista server. The UID is a 16 alphanumeric code uniquely identifying this server for licensing and tracking purposes.
Never share the UID of the server.
The UID is generated automatically upon installation, and each server must have a unique UID to function properly.
Cloning servers post-installation will create two servers with identical UIDs, which will result in problems and licensing issues.
Server Information
The second field shows the build version and server information.
Build shows the version of the Arista-vm.
Kernel shows the kernel version. The other fields are used by Arista support.
Current "licensed" device count shows the current number of devices in the host table that count as "licensed" devices.
Highest "licensed" device count since reboot shows the highest value of licensed devices seen by this Arista since reboot.
Licenses
The Licenses grid shows the current licenses for this Arista server (this UID). Hitting the Refresh button will refresh the current licenses state from the Arista licenses server.
If you have any issues with incorrect licenses or any licensing issues, contact このメールアドレスはスパムボットから保護されています。閲覧するにはJavaScriptを有効にする必要があります。 so we can help resolve them.
License Agreement
There is currently no text in this page. You can search for this page title in other pages, search the related logs, or create this page.
Administration
Administration controls the administration-related functionality of the NG Firewall server.
- Admin
Admin stores settings related to the administration settings for NG Firewall.
- Certificates
NG Firewall uses digital certificates when serving web content via SSL.
- Simple Network Management Protocol
Simple Network Management Protocol (SNMP) can be used to remotely query and monitor the current state of the ETM server.
- Skins
Skins control the look and feel of the administration interface. Skins allow customization and tuning of the look and feel of the Arista administration.
- Reports
Reports can be searched and further defined using the time selectors and the Conditions window at the bottom of the page. The data used in the report can be obtained on the Current Data window on the right.
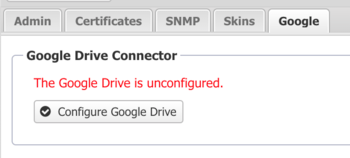
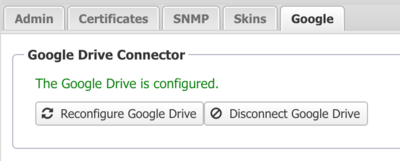
- Google
Google Drive connector enables certain features of NG Firewall to store data to the connected Google account. For example, you can set the Configuration Backup app to store configuration backups to Google Drive.
Admin
Admin stores settings related to the administration settings for NG Firewall.
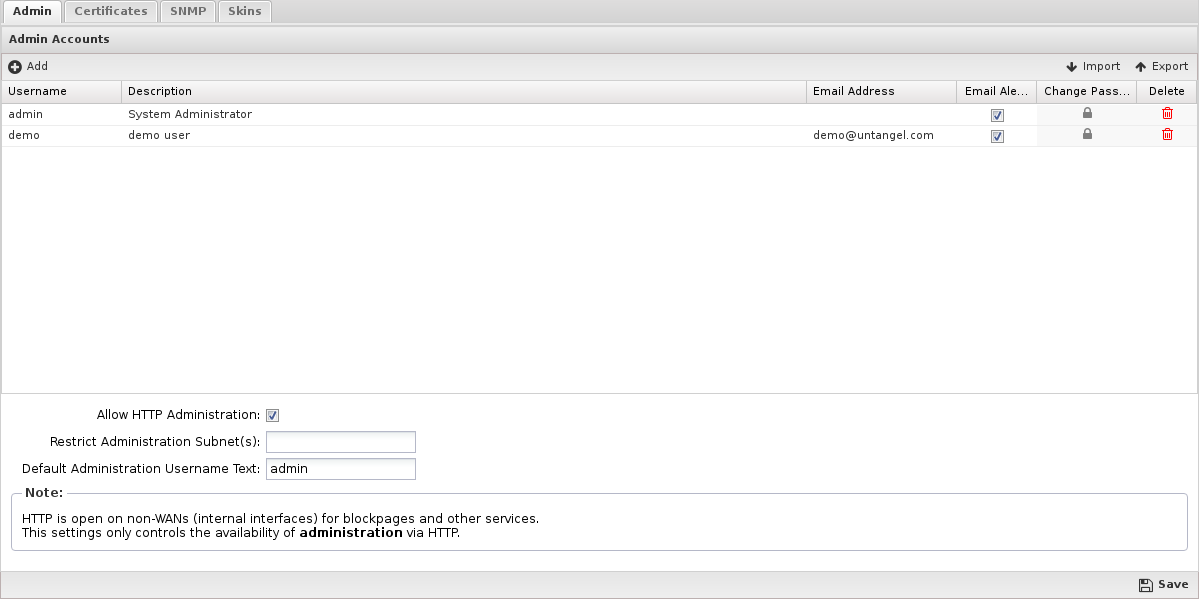
Admin Accounts
This table stores the administration accounts that can administer NG Firewall. Administrators have full administrator/root access to the NG Firewall server.
- If you have multiple administrators and want to distinguish who logged in at what time.
- You want to be able to easily disable/enable access for an administrator without changing the admin password.
Additional administrator accounts are also administrators. They also have full administrator/root access.
Allow HTTP Administration
Root
For convenience, when saving administrator account settings, the "root" shell password is set to the the password of the admin account. If there is no admin account (because it was renamed to something else), then the root password is not set.
The root password is stored separately from administrator account passwords. It can be changed in the shell using passwd to any value. However, if you modify the admin password, the root password will be set to the new "admin" password when saved.
Password Recovery
If you forget the "admin" password - follow the Password Recovery process to reset the administration login/password settings to default.
Certificates
NG Firewall uses digital certificates when serving web content via SSL.
About Digital Certificates
- Create and use a server certificate signed by the internal certificate authority
- Create a Certificate Signing Request (CSR), which you can have signed by a third party certificate authority.
If you plan on using the SSL Inspector application, option #1 is likely a good choice. Since you'll need to install the root certificate on all client computers and devices to use SSL Inspector effectively, it makes sense to also sign the certificate used by the NG Firewall server with this same CA.
If you aren't going to use the SSL Inspector, or have some other reason to prefer a third party certificate, then option #2 may be a better choice. This will allow you to obtain and use a server certificate signed by a third party authority. The benefit here, assuming you use one of the standard and well known providers, is that their root certificate will already be included in the list of trusted CA's on client computers and devices, so you won't have to distribute and install a new root certificate.
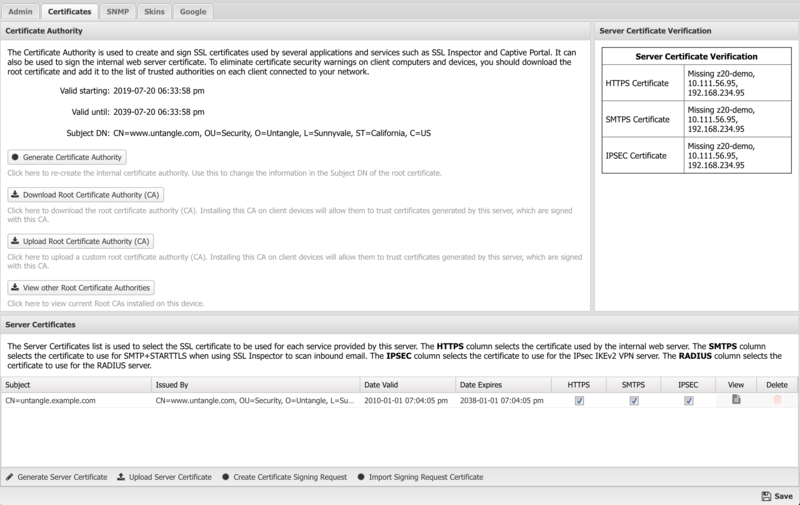
Certificate Authority
During the initial server installation, a default Certificate Authority (CA) was created automatically. This CA is used to create and sign imitation certificates generated on the fly by the SSL Inspector application. It was also used to sign the default server certificate used by the server itself. You can use the default CA as is or generate a new CA if you want to customize the information in the root certificate.
Generate Certificate Authority
When you click this button to generate a new CA, you will be presented with a popup form where you can enter the details to be included in the Subject DN of the new root certificate. Since this operation creates a root certificate, not a server certificate, the CN field can contain anything you like. Once the form is complete and you click the Generate button, the new CA will be created, and the Certificate Authority information fields will be updated to display the contents of the new certificate.
Download Root Certificate
Click this button to download the root_authority.crt certificate file of the Certificate Authority on the NG Firewall server. If you are using SSL Inspector, or if you have configured your NG Firewall server to use a server certificate signed by the internal Certificate Authority, you will need to download and install this certificate on all client computers and devices to eliminate certificate warning messages when browsing or accessing secure content.
Alternatively, you can download the certificate from a client system by navigating to http://yourserver/cert.
Upload Root Certificate (CA)
This option enables you to upload the root certificate and key files you may have generated using a different source. You can either paste the contents of the certificate and key files or upload the PEM formatted files.
View other Root Certificate Authorities
This option enables you to view other Root Certificates that you may have previously uploaded. If necessary, you can revert to a previous Root Certificate.
Server Certificate
The Server Certificate secures all HTTPS connections with the NG Firewall server. This mainly applies to the Administrative Console and the Email Quarantine pages.
During the initial server installation, a default certificate is created and signed using the default Certificate Authority created during installation. You can use the default root certificate as is, or you can generate a new server certificate if you want to customize the information contained in the server certificate.
Generate Server Certificate
When you click this button to generate a new server certificate, you will be presented with a popup form where you can enter the details to be included in the Subject DN of the server certificate. All fields are optional except for the Common Name (CN) field, which should contain the hostname that will be used to access the server.
Example: hostname.domain.com
Once the form is complete and you click the Generate button, the new server certificate will be created, and the NG Firewall server will start using it immediately. The Server Certificate information fields will also be updated to display the contents of the new certificate.
Third Party Certificate
Upload Server Certificate
Click the Upload Server Certificate button to upload an official signed certificate provided by a CA, or you generated yourself.
Certificates from CAs are provided in many different formats. The Import a certificate or key file button can be used to upload the certificates and keys. First, press Import a certificate or key file and select the certificate. Second, press the Import a certificate or key file and select the private key file. Repeat this process for any additional separate intermediate certificates (not commonly required). When finished, the Server Certificate field should contain the server cert, and the "Certificate Key" field should contain the private key. Additionally, the "Optional Intermediate Certificates" field may be populated if the CA provides an intermediate certificate. At this point, click Upload Certificate to upload the certificate. Don't forget to adjust how the new certificate will be used (HTTPS, IPSEC, etc) in the Server Certificates table!
Alternatively, instead of importing files, you can copy and paste the certificate, key, and intermediate certificates provided by the CA into the fields.
Create Signature Signing Request
Click the Create Signature Signing Request button to generate a signature signing request; you will be presented with a popup form where you can enter the details to be included in the Subject DN of the CSR. Once the form is complete and you click Generate, a server_certificate.csr file will be downloaded to your computer. The certificate authority you choose will require this file and possibly additional information to verify that you are the "owner" of the website for which you are requesting the certificate. When they receive all the required information and any associated fee, they will issue you a new certificate file, which you can upload to the NG Firewall server.
Import Signing Request Certificate
When you receive your signed certificate, click the Import Signing Request Certificate button to upload the certificate to the NG Firewall server. Certificates are provided in many different formats.
You can select the Import a certificate file to upload a certificate file provided by the signer. This will parse the file and put the result in the displayed Server Certificate field and any other optional "Intermediate Certificates" in the Optional Intermediate Certificates field. To finish the upload, click the Upload Certificate button.
Alternatively, you can copy and paste the certificate (text) provided by the signer into the fields and click Upload Certificate.
Simple Network Management Protocol
Simple Network Management Protocol (SNMP) can be used to remotely query and monitor the current state of the ETM server.
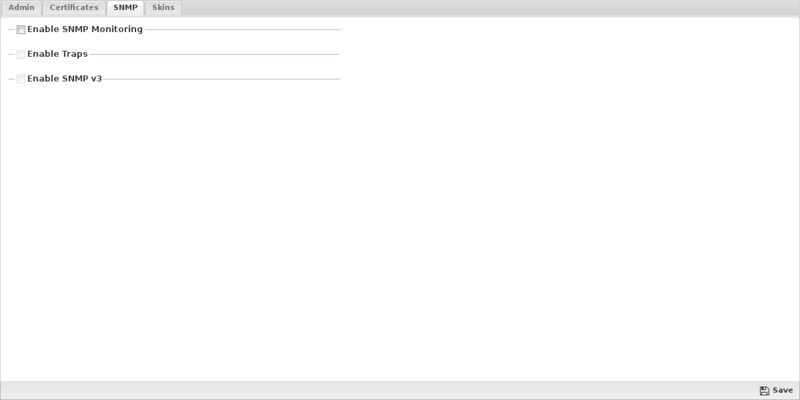
If Enable SNMP Monitoring is checked then the SNMP daemon is enabled. Access to the SNMP daemon is controlled via the Access Rules. ETM uses snmpd, and the following settings will control how the SNMP daemon is configured.
| Community (Get) | This community is for a Get* operation, which is the most common method of communication. An SNMP community is the group to which devices and management stations running SNMP belong. The SNMP community defines where information is sent. The SNMP community acts as a password. ETM Server will not respond to requests from management system that do not belong to its community. |
| System Contact | Email address of the System Administrator that should receive SNMP messages. |
| System Location | Description of the system's location. Simply use the default if you don't want to specify a location. |
| Enable Traps | If checked, SNMP traps (events) will be sent to the configured host/port. |
| Community (Traps) | This community is for a Trap or Inform operation, which is a rare method of communication. An SNMP community is the group to which devices and management stations running SNMP belong. The SNMP community defines where information is sent. The SNMP community acts as a password. ETM Server will not respond to requests from management stations that do not belong to its community. |
| Host | The host name or IP address of the management system authorized to receive statistics from the ETM Server. |
| Port | The default port for SNMP traps is 162. |
Skins
Skins control the look and feel of the administration interface. Skins allow customization and tuning of the look and feel of the Arista administration.
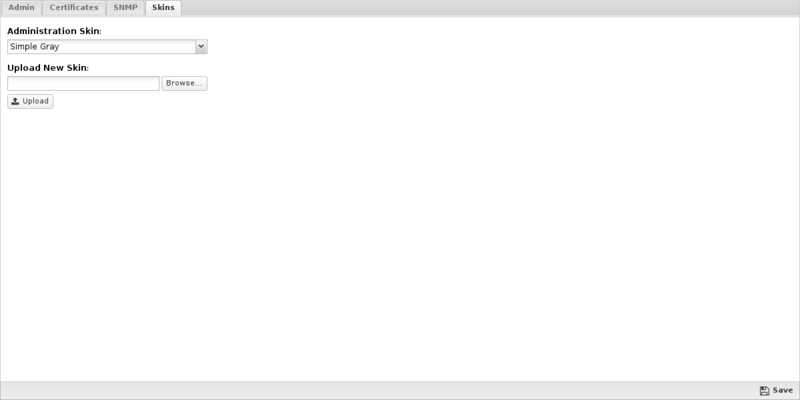
Administration Skin configures the skin to be used to render the administration UI.
Upload New Skin allows for the upload of custom skins.
Example: Dell Rack AMD Skin
Dell Rack AMD
Example: Black Cammo Skin
Black Cammo Skin
Custom Skins
Custom Skins can be created. It requires extensive work and knowledge of HTML and CSS.
Download the Arista Skins Cookbook for instructions on creating custom skins.
Reports
Reports can be searched and further defined using the time selectors and the Conditions window at the bottom of the page. The data used in the report can be obtained on the Current Data window on the right.
| Report Entry | Description |
|---|---|
| Admin Logins | The number of total, successful, and failed admin logins over time. |
| Settings Changes | The number of settings changes over time. |
| Admin Login Events | All local administrator logins. |
| All Settings Changes | All settings changes are performed by an administrator. |
All Settings Changes
All Settings Changes is a report that provides a detailed view of any settings changes performed by an administrator when upgrades are applied. This is available on all systems in the .
The Reports tab shows the timestamp when the change was made, username and hostname that made the change, and the settings files that were changed.
By clicking the Differences button, you can see the exact changes made to the files. This uses a color coded ‘diff’ like feature to show the differences.
Red = Line was removed
Green = Line was added
Yellow = Line was changed
Port Forward Rule Example
The following shows an example of adding a port forward for DNS to the system.
Settings ChangeFirst, you can see that the rule was added on 8/3/15 by the user admin from IP 10.24.24.40. The settings file that changed was network.js with the appropriate version-YYYY-MM-DD-time.js file name.
By clicking the Differences button, you can see all changes. For this instance, only the DNS rule was added and the changes are recorded below.
Settings ChangeRelated Topics
Google Drive connector enables certain features of NG Firewall to store data to the connected Google account. For example, you can set the Configuration Backup app to store configuration backups to Google Drive.
Events
Events control the handling of "events" in NG Firewall.
Within NG Firewall and the apps, when noteworthy actions occur, an "event" is logged. An event is an object that describes an action. For example, an HttpRequestEvent is logged when a client on the network makes an HTTP Request. A SessionEvent is logged when a PC creates a network connection.
The Event Definitions page details all of the events and the attributes.
- Evaluate Alert Rules below section and create, log, and send an alert if necessary.
- Evaluate Trigger Rules from the below section and take action if necessary.
- Evaluate Syslog Rules from the below section and send a syslog message if necessary.
- Send the event to Reports, if installed, to save it in the reports database.
Alerts
Alert rules are evaluated on all events logged and will log and/or alert the administrator when interesting or noteworthy events occur.
Unlike most rules, all Alert rules are evaluated beyond the first matching rule.
Each logged event is represented by a JSON object. As each event is logged into the database, the alert rules are evaluated. If an alert rule's conditions match the logged event, the action(s) configured in the alert rule is performed.
- Enable determine if the alert rule is enabled.
- Class is the type of event this rule matches. Selecting the Class will determine what Fields are available in the conditions.
- Conditions list the fields within the event object to be checked. If all of the conditions match, then the rule will match.
- Enable Thresholds limits the alert from firing until it reaches a certain frequency threshold.
- Exceeds Threshold Limit is the frequency limit for which this condition will match. If the frequency is greater than this value, then the threshold conditions match.
- Over Timeframe defines the time range, in seconds, to compute the frequency.
- Grouping Field defines how to group thresholds by an attribute field in the events. This field is optional.
- Log Alert logs the event to the Alert Event Log.
- Send Alert sends an email to all administrators' emails describing the event.
- Limit Send Frequency limits the number of times a rule can send an alert email To once per the configured amount of minutes. For some cases, like a low disk space alert, this is useful to limit the number of alerts sent so that an alert is not sent every minute.
If Exceeds Threshold Limit is 100 and Over Timeframe is 60, then the threshold condition will only match when this rules and other conditions match approximately 100 times over any 60 second period. If Group Field is set to "CClientAddr", then the threshold load is grouped by "CClientAddr" value in the event objects. Using the above example, this would mean that the alert would only fire when a specific "CClientAddr" like "192.168.1.100" does something over 100 times within 60 seconds. The threshold value for other clients like "192.168.1.150" is tracked separately.
Adding Alert Rules
Writing and designing alert rules can be a bit of an art.
Start by finding an event that describes the action you want to be alerted about. The Event Definitions describes all the event objects and the associated attributes on each object.
Set the Class to the event you want to alert about, then add conditions that check the fields to look for the events you are interested in.
For example, lets say we want to setup an alert for when a specific website is visited by a specific user.
As a Class, select HttpRequestEvent. Then, as a field, add domain = example.com and sessionEvent.username = example_user.
We want to know if this user visits this website a single time, so we do not want to add a threshold. We want it to log this alert, so we want to check Log, and we want to send an email, so we're going to check Send Email.
However, when a user visits a website, it does a lot of separate HTTP requests to load all of the components. We do not want to receive 20 emails each time a user visits a single page on that website. We want to check Limit Send Frequency to 20 minutes so we aren't flooded with emails.
There are many other alert rules that are not enabled by default that can provide some common examples.
Triggers
Triggers are similar to Alert rules; however, instead of alerting when something interesting happens, trigger rules can "tag" a specific host, device, or user for a specific period of time.
Unlike most rules, all Trigger rules are evaluated beyond the first matching rule.
This allows the system to keep a state on the different hosts on the network, which can serve several purposes. For example, you can tag a specific host/device/user as using a specific application when the application is used.
There are several rules that are included but not enabled to provide some examples.
- Enable determine if the alert rule is enabled.
- Class is the type of event this rule matches. Selecting the Class will determine what Fields are available in the conditions.
- Conditions list the fields within the event object to be checked. If all of the conditions match, then the rule will match.
- Enable Thresholds limits the alert from firing until it reaches a certain frequency threshold.
- Exceeds Threshold Limit is the frequency limit for which this condition will match. If the frequency is greater than this value, then the threshold conditions match.
- Over Timeframe defines the time range, in seconds, to compute the frequency.
- Grouping Field defines how to group thresholds by an attribute field in the events. This field is optional.
- Action Type determines the action taken.
- Tag Host will tag the specified host with the specified tag.
- Untag Host will remove the specified tag from the specified host.
- Tag User will tag the specified user with the specified tag.
- Untag User will remove the specified tag from the specified user.
- Tag Device will tag the specified device with the specified tag.
- Untag Device will remove the specified tag from the specified device.
-
- Target identifies the specific host/device/user. If its a single attribute name, for example, 'cClientAddr', it will look up to 3 layers deep within an object for any attribute named cClientAddr. If it is a fully qualified name like 'sessionEvent.cClientAddr', it will look at that specific attribute within the specified sub-object.
- Tag Name specifies the string (name) of the tag to be given or removed.
- Tag Lifetime specifies the lifetime of the tag when adding a tag. After the lifetime expires, the tag will disappear.
Syslog
Syslog sends events via syslog messages to a remote syslog server. To use syslog simply install a syslog receiver on another server, then enable syslog and configure as necessary.. Some syslog products are easier to set up than others. Kiwi, a third-party syslog daemon, is a favorite of many users using Windows, while those on *nix can use rsyslog.
- Host: The host name or IP address of the Syslog daemon that is authorized to receive syslog messages from the NG Firewall server. Do not set the Host to the NG Firewall itself - this will result in the hard drive filling up very quickly and most likely crashing the box.
- Port: The UDP port to send syslog messages to the syslog daemon. 514 is the default, as this is the default syslog port.
- Protocol: The protocol to use to send syslog messages. The default is UDP.
Syslog Rules
WARNING: Syslog can be a very expensive operation. If configured to send all (or most) events, it can seriously negatively impact the performance of the server.
Syslog Rules determine which events are sent via syslog.
Unlike most rules, all Syslog rules are evaluated beyond the first matching rule.
- Enable determine if the alert rule is enabled.
- Class is the type of event this rule matches. Selecting the Class will determine what Fields are available in the conditions.
- Conditions list the fields within the event object to be checked. If all of the conditions match, then the rule will match.
- Enable Thresholds limits the alert from firing until it reaches a certain frequency threshold.
- Exceeds Threshold Limit is the frequency limit for which this condition will match. If the frequency is greater than this value, then the threshold conditions match.
- Over Timeframe defines the time range, in seconds, to compute the frequency.
- Grouping Field defines how to group thresholds by an attribute field in the events. This field is optional.
-
- Remote Syslog determines if the event is sent via syslog.
To send all events via syslog, simply create one rule where Class = All and no conditions.
To send specific events to a syslog server, configure the Syslog Rules to send the specific events to the syslog server.
Email Template
You can customize the content of email alerts by editing the Email Template. Items surrounded by the percent symbol represent system variables. You can use these throughout the Subject or Body of the message. The table below describes each variable.
| Variable | Information |
| System.company | Your company name defined in Branding Manager. |
| Alert.description | The event description of the associated alert rule. |
| System.host | The Hostname of your NG Firewall system. |
| Event.class | The event class of the associated alert rule. |
| Event.summary | The event summary of the associated alert rule. |
| Event.values.keyvalue | The extended event details of the associated alert rule. |
The preview window shows in real time how your changes to the Subject or Body will appear in the email message content.
Local Directory
Local Directory stores a list of users that can be used by the applications. It also supports RADIUS for 802.1x authentication from properly configured wireless network access points.
The RADIUS Server can be enabled to allow WiFi users to authenticate as any user configured in Local Directory.
Local Users
Local Users stores a list of users that can be used by the applications.

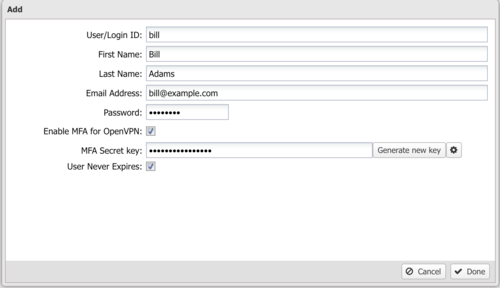
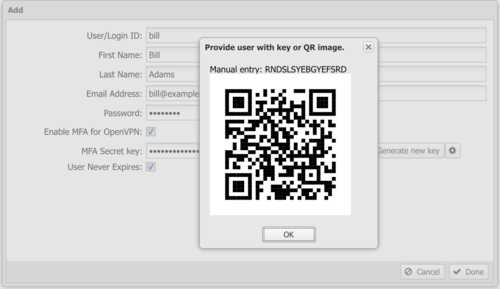
To add new users, click on the Add button. You must supply a username, first name, last name, email address, and password. Only the administrator can set the password for a given user. Users can be imported or exported using the import/export buttons on the upper right.
An expiration date can be specified for a user. If the expiration date has passed, that user will no longer be authenticated.
To select the Local Directory, configure apps such as Captive Portal and OpenVPN to authenticate against the Local Directory while requiring user authentication.
MFA and OpenVPN
RADIUS Log
Radius Log can be used to view the diagnostic messages generated by the RADIUS server.

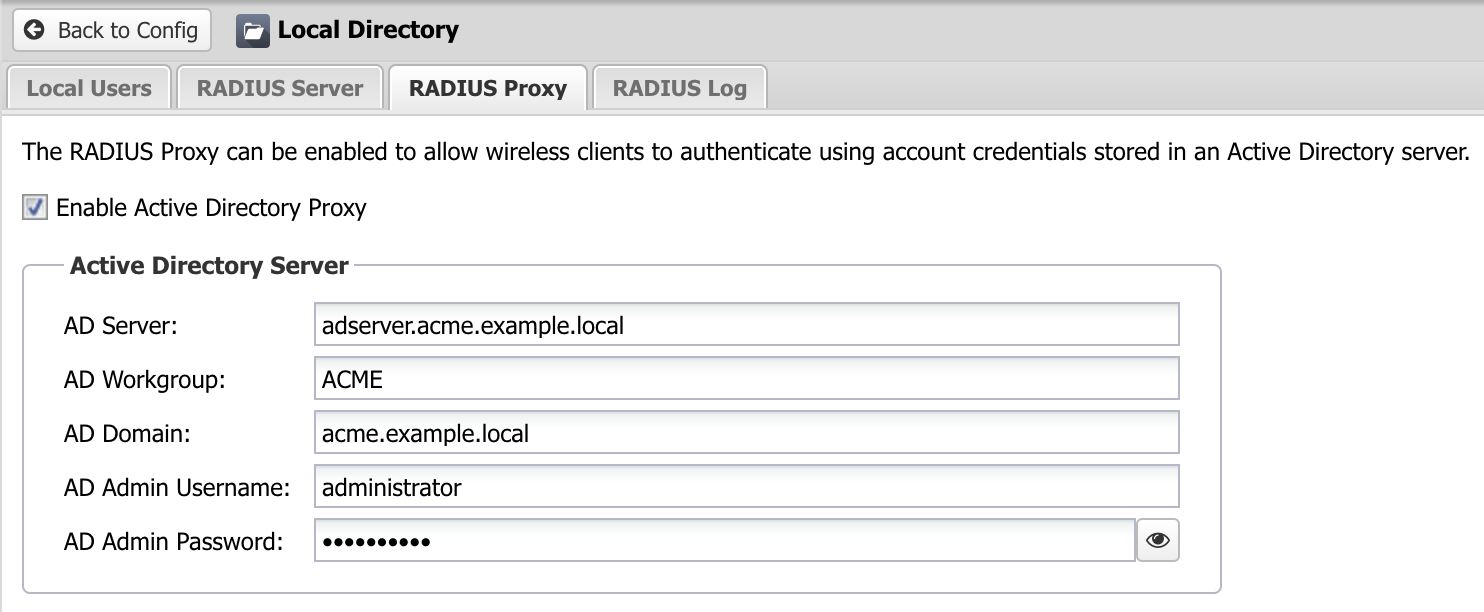
RADIUS Proxy
Radius Proxy is an optional configuration of the RADIUS Server that enables 802.1X authentication against an Active Directory server. Access points configured with WPA/WPA2 Enterprise authentication to the NG Firewall RADIUS Server can enforce login via Active Directory when joining the wireless network.
Prerequisites
The NG Firewall appliance must be able to resolve the fully qualified hostname of your Active Directory Primary Domain Controller. You can test name resolution using the DNS Test of the Troubleshooting utility. If the test fails, you must create a Static DNS Entry in the NG Firewall DNS Server.
Active Directory Server
There are three steps required to configure and verify your configuration with the RADIUS Proxy.
- Input the Active Directory Server details and click Save to apply and activate the settings.
Note: The AD Workgroup should be in upper case.
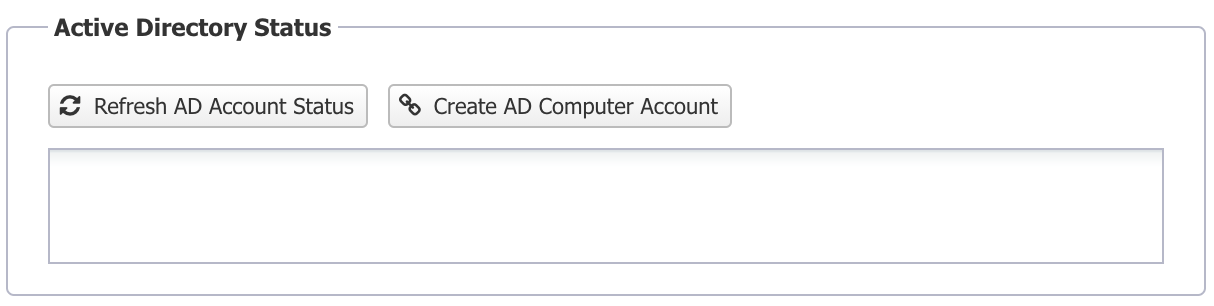
- Click the Create AD Computer Account button to register the NG Firewall server with the Active Directory server. If the operation is successful you should see the distinguishedName, whenCreated, and whenChanged fields in the AD Account Status field.
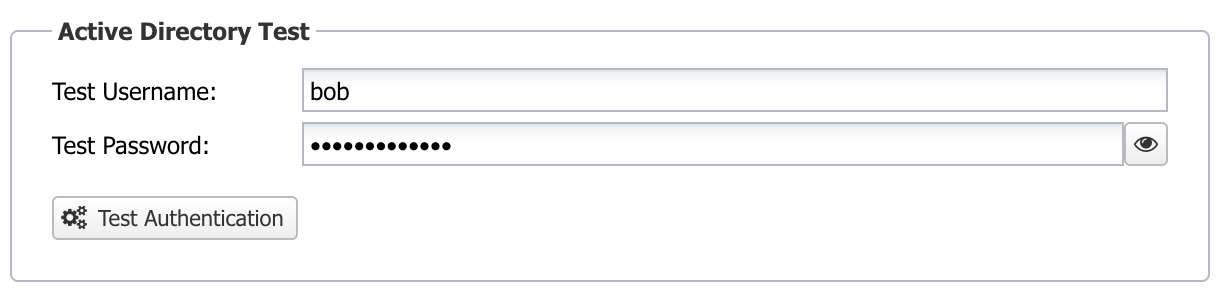
- Enter a valid username and password in the Active Directory Test area and click Test Authentication. You should see a message indicating the test was successful.
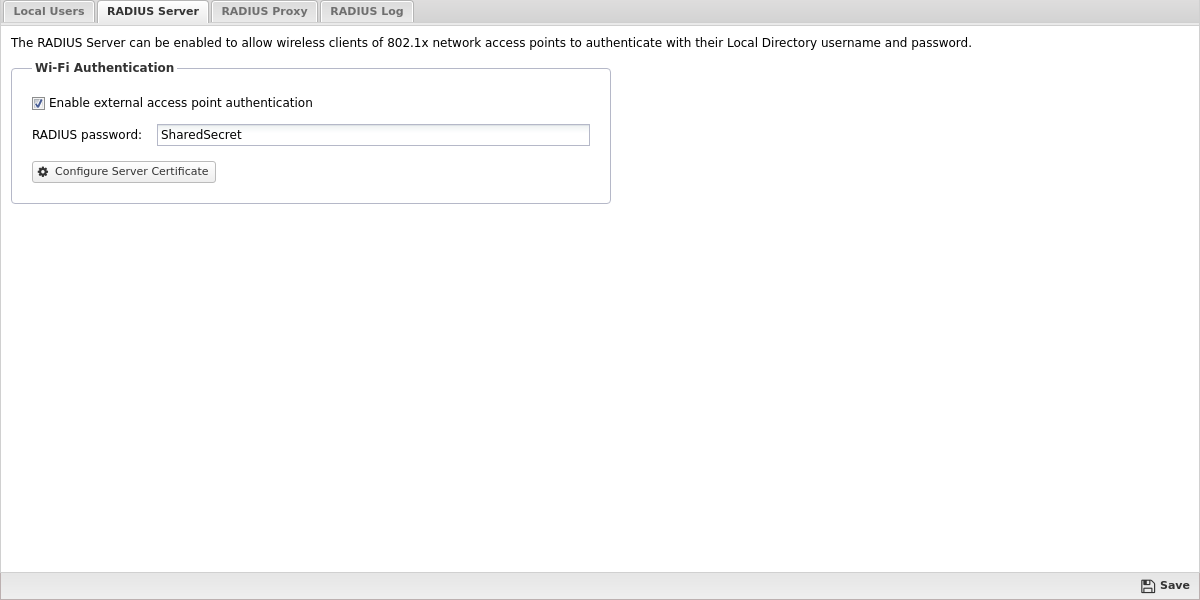
RADIUS Server
The RADIUS Server enables 802.1x wireless access points to enforce authentication via WPA/WPA2 Enterprise. WPA/WPA2 Enterprise wireless networking provides an optimal level of network authorization by requiring each wireless device to authenticate with the unique credentials of an authorized user rather than a shared password. Users are authenticated against Local Users or Active Directory via the RADIUS Proxy.
Wi-Fi Authentication
- RADIUS Server IP address - the IP address of your NG Firewall server on the same LAN segment as your wireless access point.
- RADIUS port number - the NG Firewall RADIUS authentication server listens on port 1812.
- RADIUS accounting port - the NG Firewall RADIUS accounting server listens on port 1813. This parameter is optional and may not be supported or configurable on some access points. RADIUS accounting is used by the access point to inform the NG Firewall server about the login and logout activities of each authenticated user and their associated device address.
- Shared Secret - the shared secret may also be called a password or key and is used to authorize communication between the access point and the NG Firewall RADIUS server.
Server Certificate
When clients connect to the wireless network, they must install the root certificate of your server. See Certificates. Most devices supporting WPA/WPA2 Enterprise authentication prompt the user to install the certificate when joining the network for the first time.
Access Rules

System
System contains settings related to the server
- System Reports
The Reports tab provides a view of all performance reports for the system, including cpu, memory, and disk usage.
- Regional
The tab configures the region/location specific settings of the NG Firewall server.
- Support
The tab configures the support settings and allows for rebooting and shutting down the server for support purposes.
- Logs
The Logs tab configures the number of log files to retain for each log type.
- Backup
You can export NG Firewall configuration to a local file. This includes all the settings in Config and the settings from the applications.
- Restore
Restore allows for the restoring of settings from backups created in or by the Configuration Backup application.
- Protocols
The protocols tab configures how certain protocol parsing and processing functions.
- Shield
The shield monitors the session creation rate of the clients creating sessions. Each time a session is processed by NG Firewall the shield calculates the current session creation rate of the client initiating the session.
- System Reports
The Reports tab provides a view of all performance reports for the system, including cpu, memory, and disk usage.
System Reports
The Reports tab provides a view of all system performance reports, including CPU, memory, and disk usage.
Reports
System reports can be accessed via the Reports tab at the top or the Reports tab within the settings. All pre-defined reports will be listed along with any custom reports that have been created.
Reports can be searched and further defined using the time selectors and the Conditions window at the bottom of the page. The data used in the report are obtained on the Current Data window on the right.
| Report Entry | Description |
|---|---|
| CPU Load | the CPU load over time. |
| Disk Usage | The disk utilization over time. |
| Memory Usage | The amount of free memory over time. |
| Swap Usage | The swap utilization over time as a percent of total swap size . |
| Swap Usage Bytes | The swap utilization over time. |
| Highest Active Hosts | The highest number of active hosts. |
| Server Status Events | All system status events. |
Related Topics
Regional
The tab configures the region/location specific settings of the NG Firewall server.
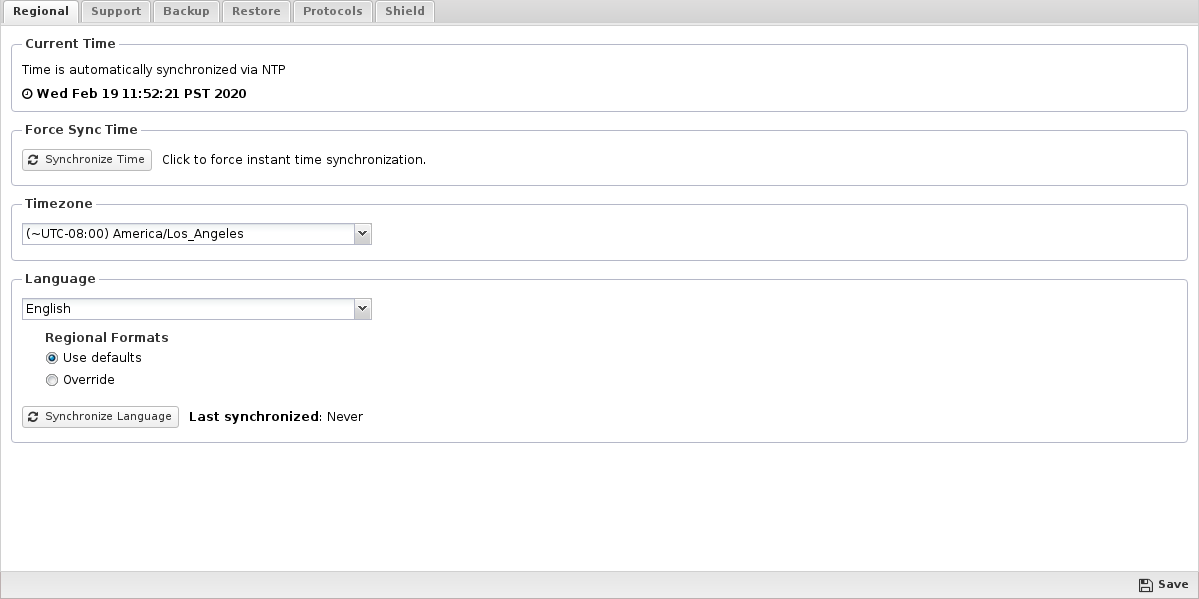
Current Time
This field displays the current time on the NG Firewall Server.
Timezone
This is the configured timezone. It is important to have the correct timezone configured to adjust for any time changesthroughout the year.
Language
This is the configured language for the NG Firewall server. The administration UI will be displayed in this language, and user-visible pages such as the quarantine and block pages. This will not change the language on certain strings like product names and all online services like the account management, help, and store pages.
Regional Formats
- Use Defaults: Use the value provided with the language.
- Override: Specify different format values for the following fields:
- Decimal Separator: This string is used to separate decimal spaces. For example, a period (.) for 1.23.
- Thousand Separator This string is used to separate thousands of places. For example, a comma (,) for 1,000.
- Date Format This string is used to generate the date display.
- Timestamp Format: This string is used to generate the time display.
Date and Timestamp Formats can use the formatting fields described on the time and date formatting page.
Force Time Sync
This button allows you to force the server time with the internet (via NTP).
Beware, if your server time is significantly in the future (hours or days), then force syncing the time may cause issues as the server's time will go backward. Threads and processes that are sleeping until a certain calendar date will now awaken at the planned time as the server time has moved significantly backward. To avoid this, reboot after forcing the time to synchronize if the time is significantly off. Also, logs and reports may behave oddly, and certain periods will occur twice.
Support
The tab configures the support settings and allows for rebooting and shutting down the server for support purposes.
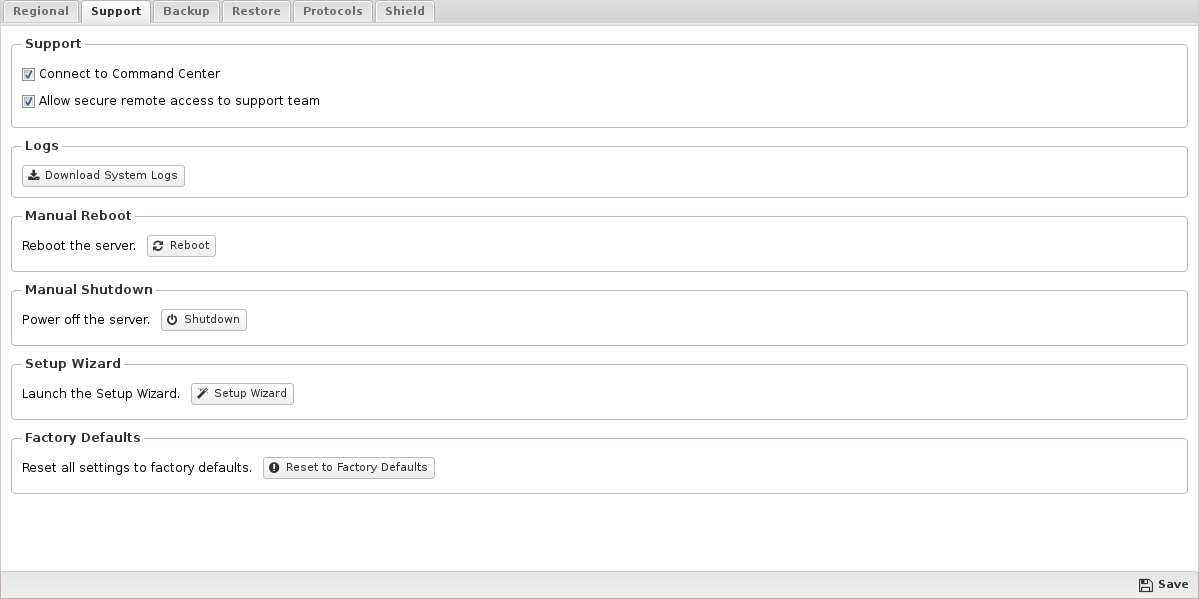
Suppose you Allow secure access to your server for support purposes. If checked, the Edge Threat Management Support team will access your server.
Manual Reboot
Manual Shutdown
This button will power off the NG Firewall server.
Setup Wizard
This button allows you to re-run the Setup Wizard, which automatically launches on a new install.
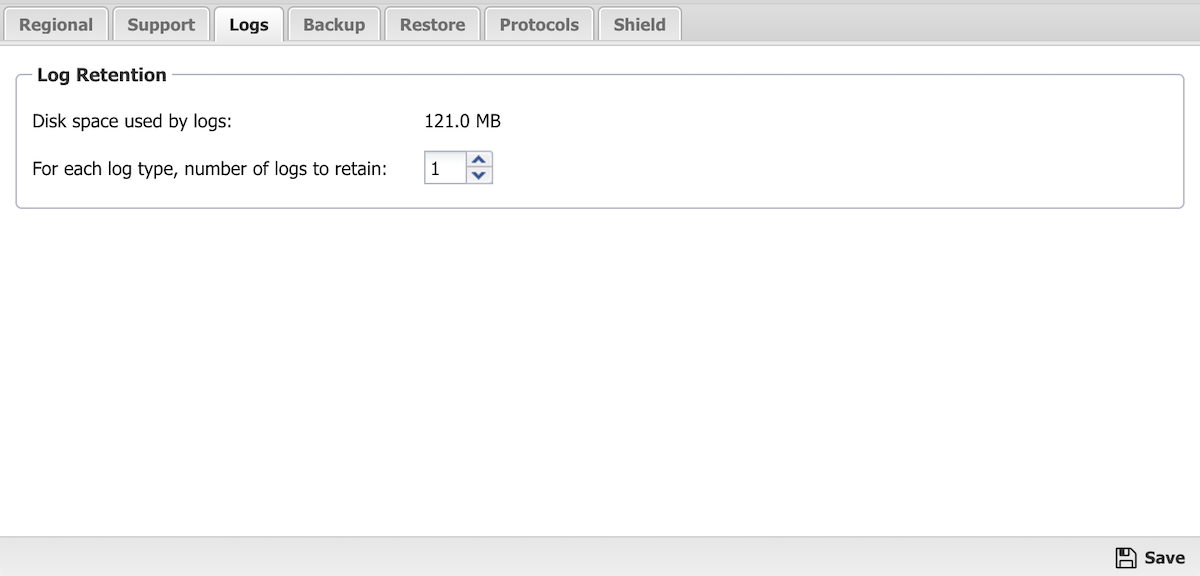
Logs
The Logs tab configures the number of log files to retain for each log type.
Log Retention
Disk space used by logs: Shows the current usage on the disk occupied by the log files.
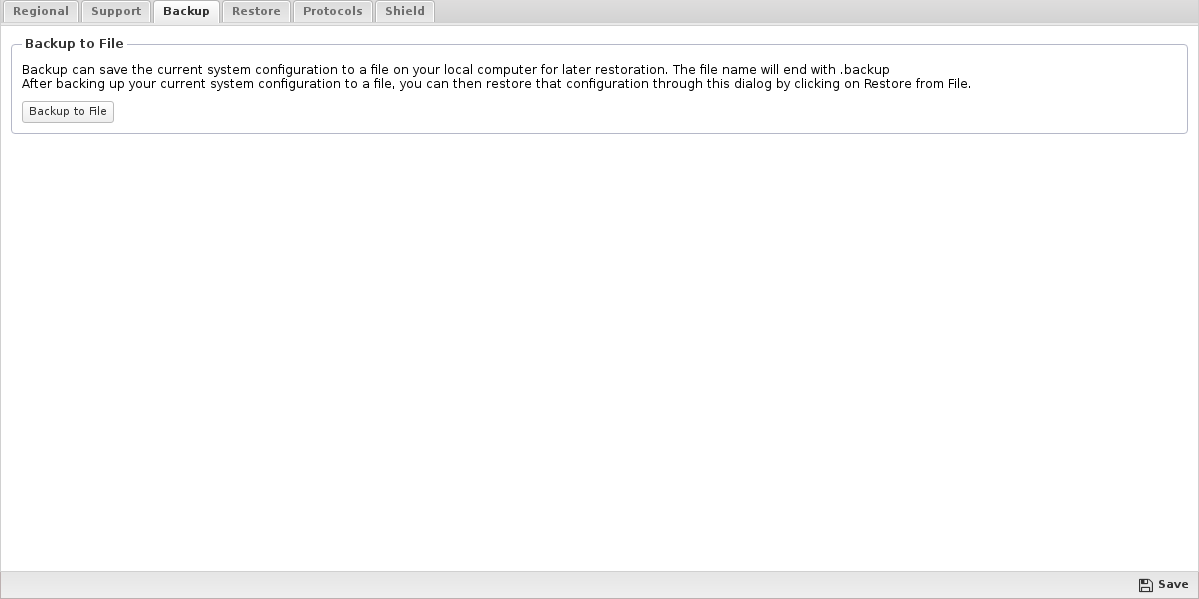
Backup
You can export NG Firewall configuration to a local file. This includes all the settings in Config and the settings from the applications. It does not include the reporting data, the quarantine data, nor any unique "configuration" like the UID of the server. To export the configuration, go to and click Backup to file. For automated configuration backup of configuration and other data, install the Configuration Backup app.
Restore
Restore allows for restoring settings from backups created in or by the Configuration Backup application.

Restore from File
This allows you to upload the restored file.
- Restore all Settings will restore all the settings in the backup file.
- Restore all except keeping current network settings will restore all the settings in the backup file except the network settings. The current network settings will be maintained.
The first option is typically used if you are restoring to a previous backup or recovering from a failure.
The second option is useful if you maintain a 'standard configuration' and you want to maintain this standard configuration across multiple servers. In this case, all the servers maintain the same settings, but each has unique network settings.
After selecting the Restore Options, click Browse and select the backup file you want to restore. After selecting the backup file, click Restore from File to begin the restore process.
Restore Process
After starting the restore process, the backup file is unpacked and checked.
If the backup file requires certain applications that are not currently on the NG Firewall server, it will ask to download these applications first. After downloading those applications, the restore process is run again.
If the backup file is from an unsupported version, it will show an error. It is also suggested that a backup file from the same version that the file was created with be restored. For example, if the backup file was created with NG Firewall 16.2, restoring it on an NG Firewall running 16.2 is suggested.
Typically, the restored process's only supported versions will be the current version of NG Firewall and the immediately prior major version. For example, 16.2 will restore 16.2 and 16.1 backups, not 16.0. (Trivial versions are considered identical to the minor version for restore purposes. For example, 15.1.0, 15.1.1, and 15.1.2 are all considered 15.1 when restoring backups.)
After the restore process begins, the NG Firewall processes will reboot, and you will lose connection to the server. After reconnecting to the server, the settings and configuration are restored from the backup file.
Protocols
The protocols tab configures how certain protocol parsing and processing functions.
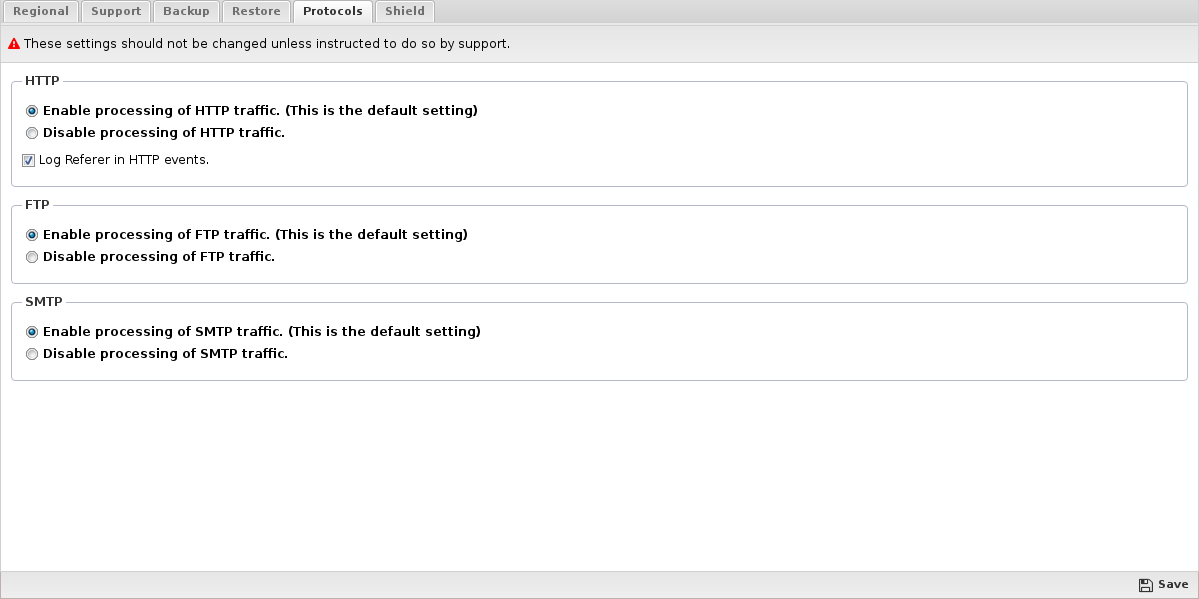
The protocols that appear and the visibility of the Protocols tab depend on the current applications installed. Many applications use hidden applications dedicated to the processing and handling of important protocols like SMTP and HTTP. These hidden applications can be enabled/disabled in this tab.
If a protocol is disabled, those sessions will still be treated as a binary stream, not parsed and unparsed.
HTTP
If enabled, the http-casing HTTP processing application is running. If disabled, all special HTTP processing by the applications stops.
SMTP
If enabled, the smtp-casing SMTP processing application is running. If disabled, all special SMTP processing by the applications stops.
FTP
If enabled, the ftp-casing FTP processing application will run. If disabled, all special FTP processing by the applications stops.
Shield
The Shield monitors the session creation rate of the clients creating sessions. Each time a session is processed by NG Firewall, the Shield calculates the current session creation rate of the client initiating the session. If the session creation rate of the client reaches a level that the Shield considers too aggressive, the session creation rate of that client is limited to that level.
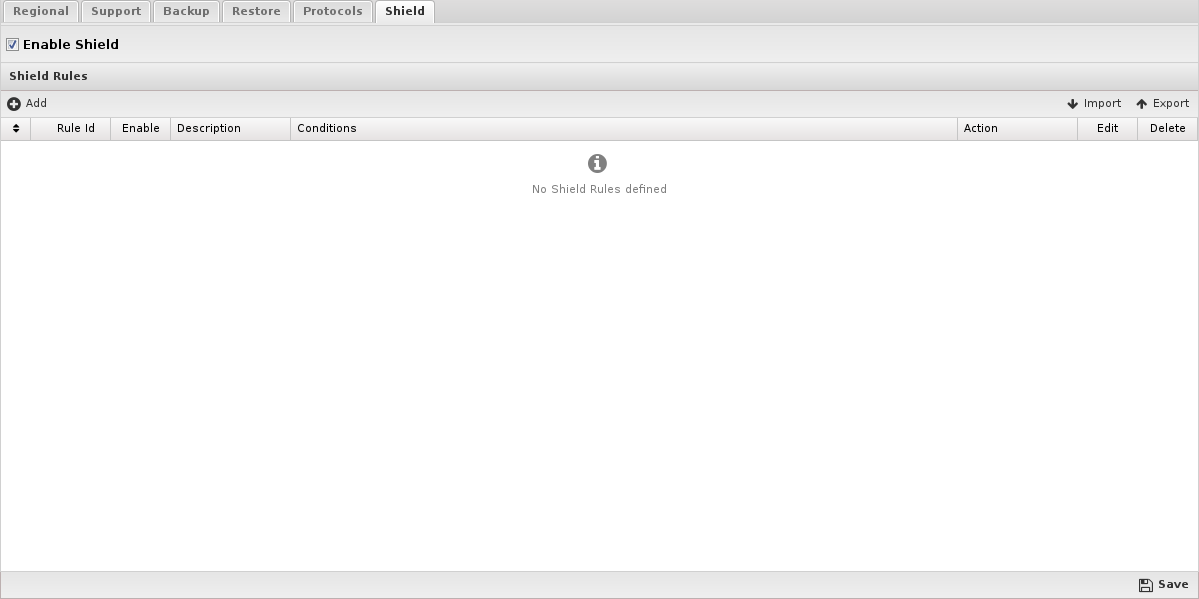
This process protects the NG Firewall server and the network from Denial of Service (DOS) attacks.
Enable Shield
If checked, the Shield is enabled. If unchecked, the Shield is disabled. Warning: do not disable the Shield. Doing so may cause performance and stability issues. This checkbox is provided to allow for troubleshooting. It is never suggested that the Shield be left disabled after any troubleshooting steps.
Note that Shield only looks at new session requests; it does not influence or process traffic of existing sessions. It also does not scan bypassed sessions.
Shield Rules
Shield rules are evaluated at session creation time. The Rules documentation describes how rules are processed.
If one of the rules matches, the action from the first matching rule is applied. If no Shield rule matches, the session will be scanned.
If the session is scanned and the current session creation rate is too high, the packet will be dropped. If the current session creation rate is not too high, the current session creation rate is adjusted to account for this new session, and the session is allowed.
Reports
The Reports tab provides a view of all reports and events for all traffic handled by Shield.
Reports
This application's reports can be accessed via the Reports tab at the top or the Reports tab within the settings. All pre-defined reports will be listed along with any custom reports that have been created.
Reports can be searched and further defined using the time selectors and the Conditions window at the bottom of the page. The data used in the report can be obtained on the Current Data window on the right.
| Report Entry | Description |
|---|---|
| Scanned Sessions | The amount of scanned and blocked sessions over time. |
| Blocked Sessions | The amount of blocked sessions over time. |
| Top Blocked Usernames | The number of blocked sessions grouped by username. |
| Top Blocked Clients | The number of blocked sessions grouped by client. |
| Top Blocked Ports | The number of blocked sessions grouped by server port. |
| Top Blocked Servers | The number of blocked sessions grouped by server. |
| Top Blocked Hostnames | The number of blocked sessions grouped by hostname. |
| Scanned Session Events | All sessions are scanned by Shield. |
| Blocked Session Events | All sessions are blocked by Shield. |
Shield Reports
The Reports tab provides a view of all reports and events for all traffic handled by Shield.
Reports
This application's reports can be accessed via the Reports tab at the top or the Reports tab within the settings. All pre-defined reports will be listed along with any custom reports that have been created.
| Report Entry | Description |
|---|---|
| Scanned Sessions | The amount of scanned and blocked sessions over time. |
| Blocked Sessions | The amount of blocked sessions over time. |
| Top Blocked Usernames | The number of blocked sessions grouped by username. |
| Top Blocked Clients | The number of blocked sessions grouped by client. |
| Top Blocked Ports | The number of blocked sessions grouped by server port. |
| Top Blocked Servers | The number of blocked sessions grouped by server. |
| Top Blocked Hostnames | The number of blocked sessions grouped by hostname. |
| Scanned Session Events | All sessions are scanned by Shield. |
| Blocked Session Events | All sessions are blocked by Shield. |
Related Topics
Email contains all the email-related configuration of the NG Firewall server.
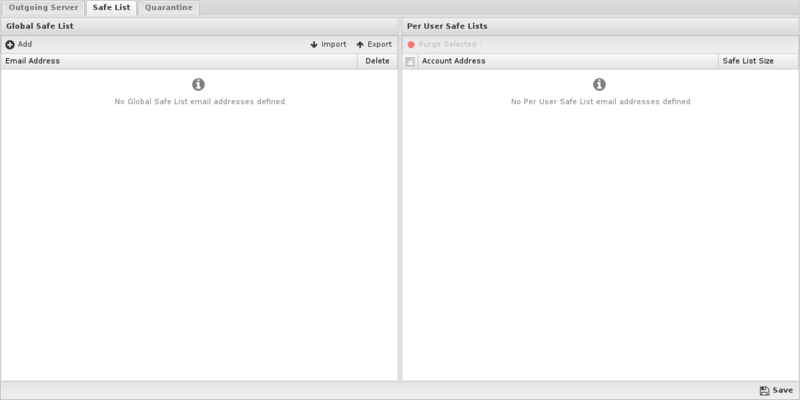
Safe List
The safe list is a list of email addresses considered safe or trusted.
Safe List
Several applications, such as Spam Blocker, NG Firewall Filter Apps, and Phish Blocker scan SMTP messages.
Sometimes, administrators want to trust email from certain addresses to avoid scanning messages to either save resources or avoid false positives. The safe list provides a convenient location to list safe and trusted email addresses that these applications will check before scanning email.
Global Safe List
This is a global safe list that applies to all email. If an email address is listed, all mail from that address will not be scanned in Spam Blocker, NG Firewall Filter Apps, and Phish Blocker.
Emails can be specified using Glob Matcher syntax so, for example, you can safely list entire domains as "*@example.com."
Per-User Safe List
Each user/email address also has its safe list. For example, lets assume "このメールアドレスはスパムボットから保護されています。閲覧するにはJavaScriptを有効にする必要があります。" has a quarantine that they manage via the quarantine application. In the quarantine application, they can add addresses to their safe list.
For example, このメールアドレスはスパムボットから保護されています。閲覧するにはJavaScriptを有効にする必要があります。 may add "このメールアドレスはスパムボットから保護されています。閲覧するにはJavaScriptを有効にする必要があります。" to their safelist. All email from "このメールアドレスはスパムボットから保護されています。閲覧するにはJavaScriptを有効にする必要があります。" to "このメールアドレスはスパムボットから保護されています。閲覧するにはJavaScriptを有効にする必要があります。" will automatically be passed as safelisted, while email from "このメールアドレスはスパムボットから保護されています。閲覧するにはJavaScriptを有効にする必要があります。" to other users will be scanned as normal.
Per-User safe lists provide a mechanism to deal with false positives that won't effect the overall false negative rate of other user/emails.
Emails can be specified using Glob Matcher syntax so, for example, you can safely list entire domains as "*@example.com." Also, note that a user/email can add "*" to their Per-User safe list to entirely disable spam/phish scanning for emails to them.
Users can edit their own Per-User safe list in the quarantine web application. Administrators can purge users's safe lists in the administration UI.
Server
Unique ID
The first field shows the Unique ID (UID) of the Arista server. The UID is a 16 alphanumeric code uniquely identifying this server for licensing and tracking purposes.
Never share the UID of the server.
The UID is generated automatically upon installation, and each server must have a unique UID to function properly.
Cloning servers post-installation will create two servers with identical UIDs, which will result in problems and licensing issues.
Server Information
The second field shows the build version and server information.
Build shows the version of the Arista-vm.
Kernel shows the kernel version. The other fields are used by Arista support.
Current "licensed" device count shows the current number of devices in the host table that count as "licensed" devices.
Highest "licensed" device count since reboot shows the highest value of licensed devices seen by this Arista since reboot.
Outgoing Server
This configures how NG Firewall will send emails.
The NG Firewall server sends emails for several reasons:
- The Quarantine facility sends users a daily digest of the spam they receive.
- The Quarantine allows users to "release" emails from the quarantine.
- The Reports sends daily summary reports to administrators about NG Firewall server activity.
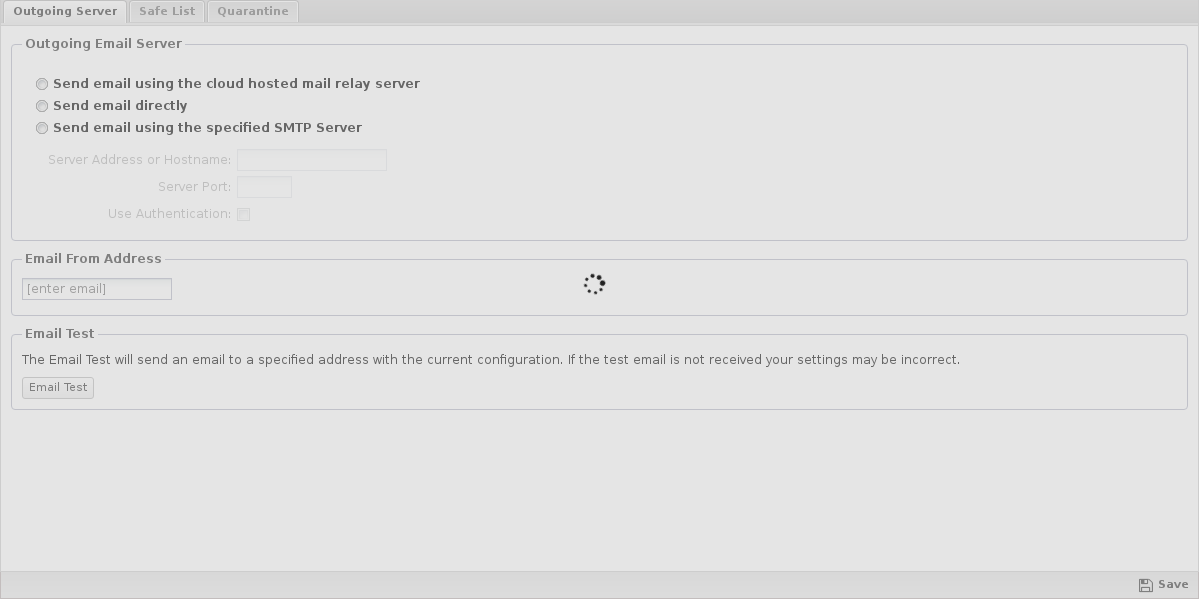
Outgoing Email Server
If the Sent email is checked directly, the NG Firewall will send emails like a regular email server. It does this by looking up the MX DNS record of the recipient domain and sending the message via SMTP to that address. This generally works with no further configuration. However, many residential and even commercial ISPs block port 25 to prevent spam, and this will prevent NG Firewall from sending emails.
- Server Address or Hostname is the IP address or hostname of the SMTP relay.
- Server Port is the port to use to connect to the SMTP relay.
- The NG Firewall will authenticate with the SMTP relay if Use Authentication is checked.
- Login configures the username to use during SMTP authentication.
- Password configure the password to use during SMTP authentication.
Email from Address
This is the "from" address of all emails sent from the NG Firewall server (excluding emails released from the quarantine).
Email Test
This sends a test email from the configured Email from Address. If your email settings are correct, the specified recipient should receive the test email within a few minutes.
Quarantine
Spam Blocker NG Firewall Filter Apps, and Phish Blocker sometimes determine if an email is spam or phish, and the email should be dropped. However, dropping an email can be dangerous as it may be a "false positive" and an important email. In this case, dropping the email would be very bad.
The quarantine action in these applications exists so that important emails don't get lost. The quarantine action will silently send an email to the user's quarantine. All the suspected spam/phish emails sit in quarantine, and the user is free to review the quarantined email to verify that nothing important was quarantined.
If something legitimate was quarantined (called a false positive), the user could Release the email to their inbox.
Quarantine Web Application
Each day, users/emails with new emails in their quarantine will be sent a Quarantine Digest email with a link to their quarantine. Alternatively, users can request a Quarantine Digest email by accessing https://NGFW_IP:HTTPS_PORT/quarantine/.
Quarantined Messages: The Quarantine Messages tab shows the list of messages currently in the quarantine. To release messages to the inbox, simply check the message(s) and click on Release to Inbox. To release a message and automatically add the sender to your safe list, click on Release to Inbox & Add Senders to Safe List. To delete message, select the message(s) and click Delete. Note that it is not necessary to delete messages; messages will automatically be purged from quarantine after the configured time elapses.
Safe List: This tab configures your safe (trusted) email addresses. Email from the listed address will not be scanned to determine if they are spam or phishing. If a user's email is falsely determined to be spam, their email address can be added to this list to assure it does not happen again.
Forward or Receive Quarantines: Mailing lists or aliases often receive Quarantine Digests. This is annoying as all users on the list will receive the Quarantine Digest email. To avoid this, you can forward the quarantined mail to another user's quarantine, such as the email list administrator. Email will still be quarantined and released like normal, but the administrator can do it via their quarantine. Forward Quarantined Messages To configure where quarantined messages will be placed. Received Quarantined Messages From shows any other addresses from which you are receiving quarantined messages.
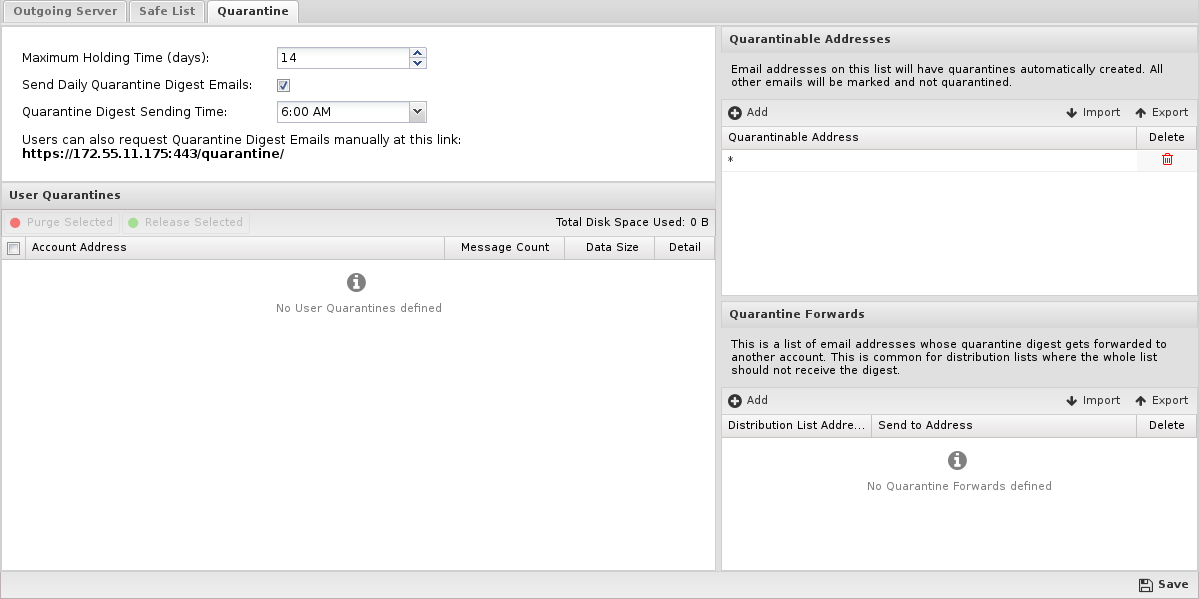
Quarantine Settings
- Maximum Holding Time (days) configures how long an email will be held in a quarantine before it is automatically deleted.
- Send Daily Quarantine Digest Emails configures if daily emails will be sent to users with new mail in their quarantine.
- Quarantine Digest Sending Time configures when the daily digests will be sent if enabled.
User Quarantines: This shows a list of currently existing user quarantines. User quarantines are created dynamically when an email is quarantined for an email address. There is no need to delete quarantines; this will happen automatically when there are no messages. To release or purge (delete) a user's entire quarantine, select the appropriate row(s) and clickthe Purge Selected or Release Selected button at the top. To view a user's quarantine, click on the Show Detail icon on the appropriate row. This will display a window showing all the existing messages in that user's quarantine. Messages are purged (deleted) or released by clicking on the message(s) and clicking on the Purge Selected or Release Selected button at the top.
Quarantine Forwards: As discussed above, it is often desirable to have distribution lists or aliases for their quarantined email to an administrator's email quarantine so the entire list does not receive quarantine digest emails. You can view/add/delete forwards in this table.