Concurrent Login Session Restriction
CloudVision allows users to maintain multiple login sessions simultaneously. However, to prevent account sharing, administrators can limit the number of active login sessions a user can have and terminate open sessions if a user has reached their limit and are unable to log in. You can configure the maximum number of concurrent login sessions that users can have in General Settings > Session Management.
Configuring Concurrent Login Session Restrictions
To verify that you have the authority to configure the login limit, go to Settings > Roles. Users with Read and Write access in Account and Session Management can configure login limits.
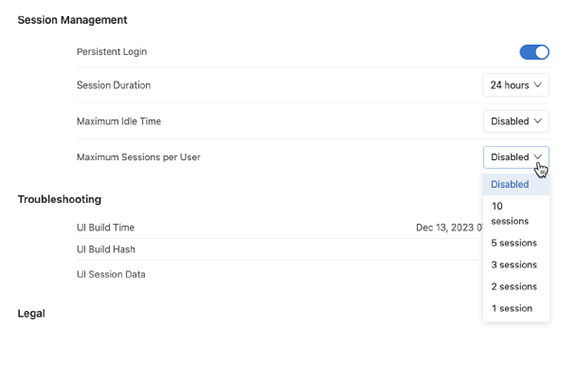
- Navigate to General Settings > Session Management and select the
maximum number of simultaneous sessions that users can have.
Figure 1. Session Management - Selecting Maximum Number of Sessions 
- Determine whether or not to show users a relevant login error when their maximum
sessions are reached by enabling or disabling the toggle. Note: It is recommended to show the login error for maximum sessions reached, which is enabled by default.
Figure 2. Enabling Maximum Sessions Error 
If the toggle is enabled, users with more than the allowed number of open sessions will be notified that their maximum number of sessions has been reached. If the toggle is disabled, they will instead be shown a generic authentication failed message.
Terminating Open Sessions
If a user is locked out of CloudVision or has exceeded the allowed number of login sessions and is unable to delete one or more sessions, an administrator can clear all open sessions. This will enable the user to log in.
An administrator, in this case, is anyone with Read and Write access to Account and Session Management and Read and Write access to User Session Deletion.
To end all open sessions for a user,
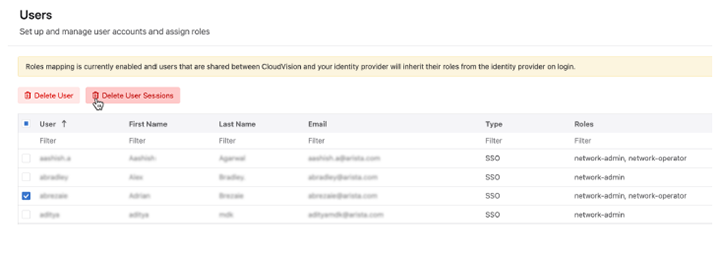
- Navigate to Settings > Users.
- Enable the checkbox next to the username of any user whose open sessions require termination.
- Click Delete User Sessions.

Configuring a Session
A mirroring session is the configuration created for one or more device interfaces. You will select the devices and interfaces with user tags. This enables you to select devices, for example, all leaf devices in a particular data center or campus pod. You will then select whether to send the mirrored configuration over a SPAN interface or GRE tunnel. Depending on the platform, multiple SPAN interfaces may be supported.
Configuring a New Session
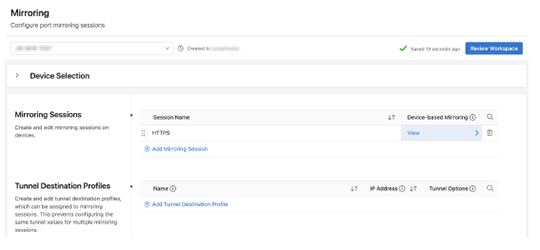
- Select Add Mirroring Session, give your session a name, and select
View.
Figure 4. Add Mirroring Session 
- Select Add Device and enter a tag query.
Figure 5. Add Device 
- Select Add Source Interface, enter a tag query, and select a
direction.
Select either RX, TX, or both to mirror the selected traffic direction from the interface.
Figure 6. Add Source Interface 
- For a destination select either SPAN Interfaces or Tunnel.
Either a SPAN interface or a tunnel can be configured but not both. If you want to change from one to the other, you will need to delete the existing configuration.
Figure 7. Select SPAN Interfaces or Tunnel 
- For a SPAN interface, select the interface using a tag query.
Figure 8. SPAN Interface, 
Once you submit the workspace and execute the associated change control, the devices will begin mirroring traffic to the remote host.
