Mirroring Studio
Port mirroring allows the duplication of ethernet packets or frames on a source interface to send to a remote host, like DANZ Monitoring Fabric (DMF). The mirrored packets or frames can be sent via a SPAN interface dedicated for communication with the host or over an L2 Generic Routing Encapsulation (L2GRE) tunnel.
The Mirroring Studio uses tags to identify devices and interfaces. Allowing for the quick selection of devices with a particular location or role in your network, like spine or leaf devices, and define a common interface on which to mirror traffic.
Related Topics
Configuring a Session
A mirroring session is the configuration created for one or more device interfaces. You will select the devices and interfaces with user tags. This enables you to select devices, for example, all leaf devices in a particular data center or campus pod. You will then select whether to send the mirrored configuration over a SPAN interface or GRE tunnel. Depending on the platform, multiple SPAN interfaces may be supported.
Configuring a New Session
- Select Add Mirroring Session, give your session a name, and select
View.
Figure 1. Add Mirroring Session 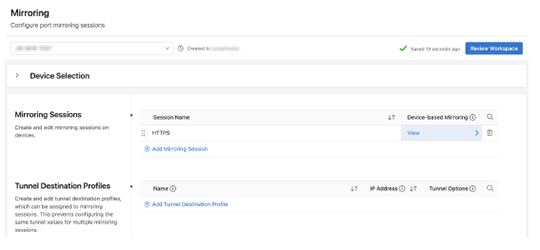
- Select Add Device and enter a tag query.
Figure 2. Add Device 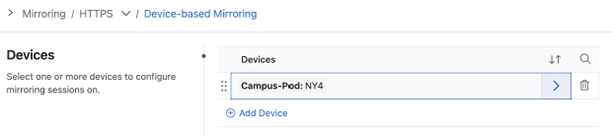
- Select Add Source Interface, enter a tag query, and select a
direction.
Select either RX, TX, or both to mirror the selected traffic direction from the interface.
Figure 3. Add Source Interface 
- For a destination select either SPAN Interfaces or Tunnel.
Either a SPAN interface or a tunnel can be configured but not both. If you want to change from one to the other, you will need to delete the existing configuration.
Figure 4. Select SPAN Interfaces or Tunnel 
- For a SPAN interface, select the interface using a tag query.
Figure 5. SPAN Interface, 
Once you submit the workspace and execute the associated change control, the devices will begin mirroring traffic to the remote host.
Configure a Tunnel Profile
Tunnel profiles enable you to assign the same GRE tunnel attributes to multiple sessions. This means you do not need to configure the same tunnel attributes for each individual session.
- Select Add Tunnel Destination Profile and select View.
Figure 6. Tunnel Destination Profiles 
- (Optional) configure the following attributes:
-
DSCP: The DSCP value determines the priority of the tunnel's traffic. A lower DSCP value will take precedence over a higher value. Providing a high value allows you to receive mirroring traffic in real time, because it has a higher priority than any other traffic using the same tunnel.
-
Protocol: Enter the EtherType value for the encapsulated protocol.
-
TTL: Configure the time to live (TTL) of the tunnel packets. The value can be from 1-255.
-
VRF: The VRF specifies the routing table to use for resolving the GRE destination.
-
GRE Key: The GRE key is used to identify the tunnel if the same source interface is used for multiple tunnels.
-