Packaging
The Packaging feature is used to export custom change control actions from one CloudVision cluster and install them in another. Package IDs and version numbers can be used to update existing packages with version control.
Accessing Packaging
The Packaging feature is available under Settings tab in the navigation bar.
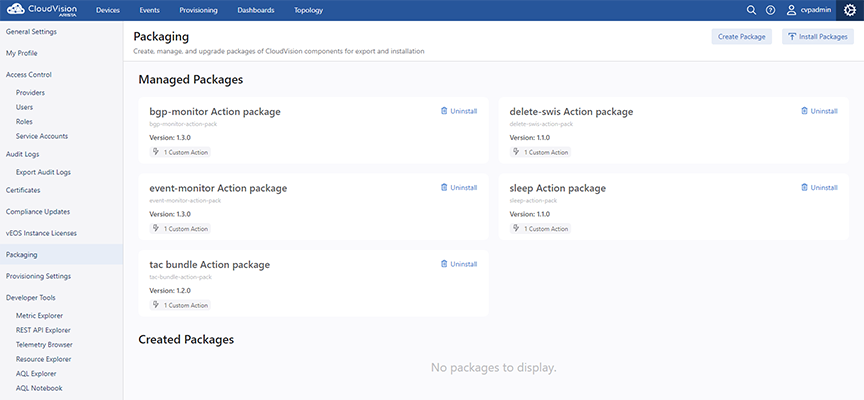
From the Packaging screen, you can create, install, and review packages.There are two main sections when managing packages:Managed Packages and Created Packages.
Managed Packages have been imported from another CloudVision cluster and installed. Hover over the package to review the description.The only available function is to unistall the selected package.
Created Packages are editable and available for export to another CloudVision cluster.
Create a Package
When creating a package you can select the components to be included.You can select studios, actions, and dashboards to bundle and export. Additional actions to manage the installation and uninstallation of packages and components can be added.
Creating a Package
- From the Packaing screen, select Create Package.
- Enter a package name.
- Create a unique Package ID and enter a version number.The Package ID should be
human readable.The version number must be three digits(x.x.x).Note: Make sure that the ID does not match the Package ID of an existing package, otherwise an existing package may be overwriten.
- Enter a description of the package.
Figure 2. Creating a Package 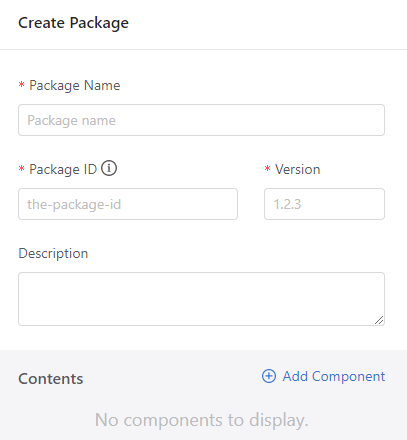
- Click Add Component and use the dropdown to select actions to include in
the package. Selected actions will appear under ContentsNote: Actions may be executed at different speeds.Limit the number of components in a package to those that are related and likely to change together, such as a pair of actions that run before and after a process.
- (Optional) Click Edit below any component name to create a unique Component ID.
- Click Create Package. The package will appear under Created Packages.
- Click Export on the package to download the .tar package file.
- Save the file to the appropriate repository so that it can easily be located for import and installation in another CloudVision cluster.
Installing a Package
Packages that have been exported as .tar files from another CloudVision cluster can be imported and installed.
- In the cluster that a packege is to be installed, open the Packaging screen and click Install Packages.
- Select or drag-and-drop the appropriate .tar file into the modal. Multiple
packages may be selected and installed at the same time.Note: Check the version number and Package ID before installation to avoid overwriting an existing package.
Figure 3. Installing Packages 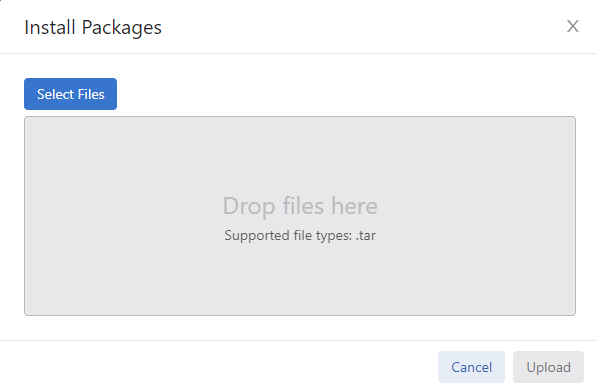
- Select Upload.
Updating a Package
Updating a package will overwrite an existing package.
- Export the package to be overwritten.
- If the package to be overwritten is listed under Created Packages it must be deleted.
- Create a new package using the same name as the package to be updated.
- Enter the package ID with the same package ID of the original package.
- Increase the version number of the original package sequentially.
- Proceed to follow the steps for uploading and installing a package, Note: Before installing an updated package, verify that you select the .tar file with the appropriate version number.